Showing posts with label fit. Show all posts
Thursday, September 27, 2012
Renfrew
I bought this pattern on impulse last weekend and boy, am I glad I did. Mostly because it really helped draw me out of this funk I've been in, sewing-wise.
I'm not sure if I've ever emphasized this point, but I am not a fast sewist. (Likely exaggerated by the fact that I'm not a patient one, either.) But sewing with knits is a big revelation. This top probably took me about... 6 hours? That includes all the prep work, cutting, fitting, and altering. I feel like, by some people's standards that might be a long time, but for me it's pretty damn fast.
(By the way... "prep work" included a step that I'm not sure was necessary. This fabric is an interlock knit that came in a tube, rather than a flat piece with selvages. When I pulled it out of the bag I realized I had no idea how to work with it. Some impatient googling led me to believe that I had to take the time to cut the whole 2+ meters down a single channel to establish grain... and guys, this is a TINY knit. Is that seriously the only way to establish grain on a tubular knit? Did the internet lead me astray? Anyway, it worked great but took forever.)
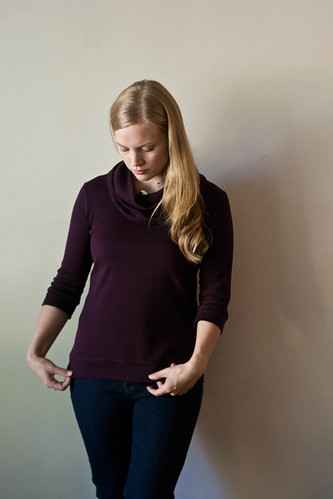
So here's the lowdown:
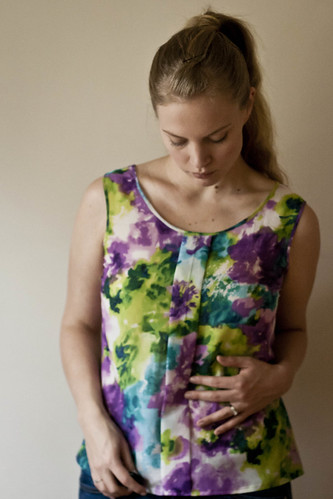
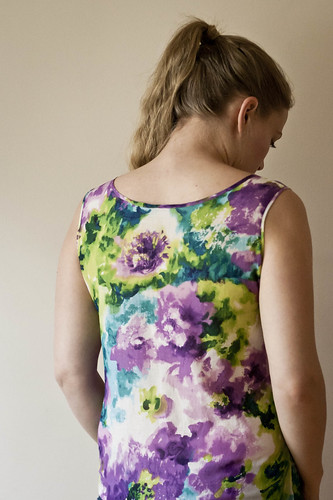
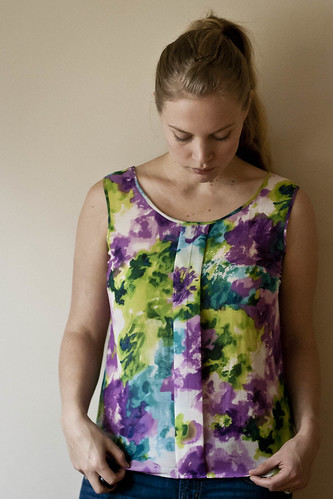
the fabric is a nice, substantial 50/50 poly/cotton blend interlock knit. You guys know I'm not really interested in using poly, but the choices for non-poly knits at my nearest fabric store were pretty slim. In any case, the fabric actually feels seriously awesome and was a pleasure to work with. That being said, I think the result looks a little more casual than I would like, due to the lack of drape in the fabric... a bit sweatshirt-y, if you will?
When looking at the pattern, my high bust puts me at a 10, my full bust puts me at a 12 and my hips put me at an 8. So I decided to follow the Lladybird method and just grade the pattern. I did a 10 for the shoulders/arms, 12 for the bust, 10 at the waist and 8 at the hips. Easy peasy.
This ultimately proved totally uneccessary. The whole thing came out too big, for one. For two, it must be years of squeezing my boobs into RTW tops, but I actually prefer a super tight fit on the bust in knits, so I think I would have been better just to leave the grading and cut a true size. (well, grading down the hips was probably wise.) The construction of the pattern is awesome, though, in that you sew up the arms and side seams in one step, so it's super easy to take it. I ended up just taking in 1/2" on each arm seam and at the bust, tapering out to nothing at the waist.
I think the fit is now totally wearable, although I still find the shoulders to be too wide and the whole thing still feels a tad loose. Additionally, the bands at the arms and hips (which, yes, I did remember to adjust accordingly) are not tight enough at all. I would prefer if bands of this nature were actually tight against my body with negative ease. Finally, I find the sleeve length isn't quite right for me... I think it needs another inch or so in length, or to be shortened to just above the elbow.
(Just a word about those fit comments... part of why I maintain this blog is to keep notes to refer to in the future. I'm not trying to dwell on the imperfections. And in truth I pick the photos that show the garment to its best advantage when possible, so the things I discuss might not always be visible. You'll just have to trust me :D).
Overall, I think this is the BEST pattern and I can't wait to make more of these. But, I think my preference would be to throw the whole "stable knits" thing out the window and start playing around with jersey, because ultimately I think this garment would suit me with a lot more drape to it. (Viscose knits, I'm looking at you.)
Be prepared for a whole host of thoughts on the idea of sewing cake... I'm sold.
Thursday, February 23, 2012
Beignet
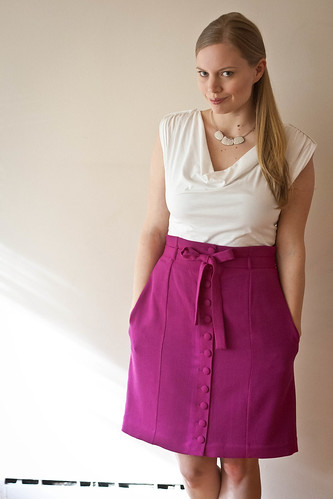
After languishing 99% finished in the cupboard for a few weeks, my Beignet skirt is finally finished.
I'm absolutely in love with this skirt. It's by far the best and most comfortable, wearable thing I've ever made.
The fabric is a wool crepe I picked up on clearance in the summer. Locals might recognize it - there were still bolts of it available at the Boxing Day sale! Either they had stocked way too much of it, or I'm just the only person in Vancouver who actually wanted to buy bright fuchsia wool. In any case, it was the best of all worlds because it was a fabric I actually wanted to work with at a price that let me justify approaching this as a "wearable muslin."
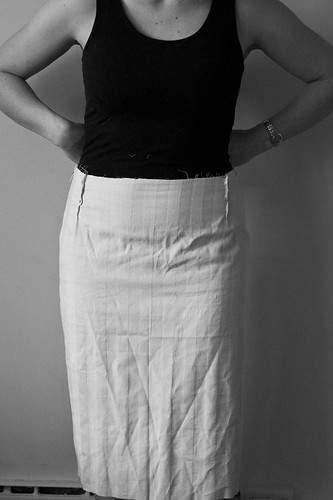
I'm very glad I approached it that way, because this project felt so much more straightforward and fun. I fall between a size 8 and 10, but closer to the 10, so I followed Colette's advice and cut that size. In the end, it was too large and I had to take in two inches all over (I simply took in the side seams). Otherwise, the fit is perfect. The proportions are correct and I absolutely love the straight silhouette - not pencil, not a-line. I love it so much, I plan to turn it into a TNT pattern with a solid front and a side zip. I also want to make another true-to-pattern version in a more neutral colour.
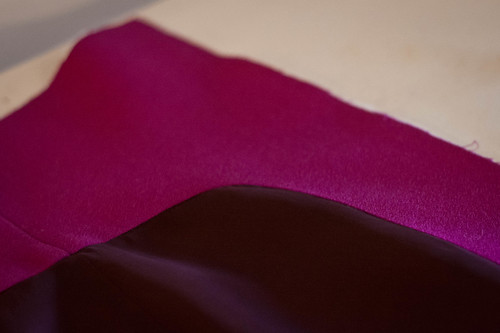
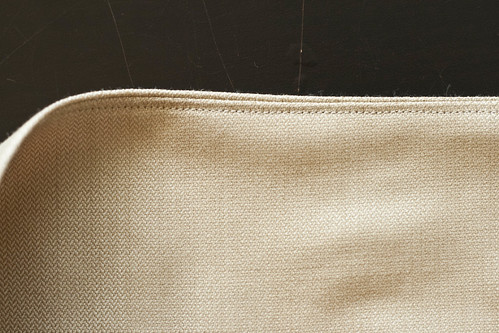
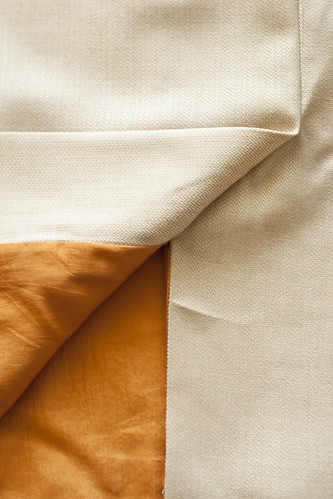
I lined it with bemberg rayon and actually really enjoyed working with it - perhaps I'd just heard too many horror stories so my expectations were low. The only real mistake I made was picking too dark a colour. In person you can see where the lining meets the facing although, happily, the belt distracts enough that it's not really an issue. I had already hemmed this once, before realizing it definitely needed taking in, and I did the machine "invisible" hem. It was a little too visible, so this time I did it by hand. I chose to omit the twill tape in the waist, which I may regret, but I didn't have it on hand and wasn't willing to make another trip!
My next project is a dress (Lonsdale), and I'm trying to decide how to approach it. After this experience, I'm really keen to continue forgoing the muslin altogether. It really does drain a lot of the fun out of sewing for me. I suppose ultimately it depends on the complexity of the pattern and the cost of materials. Since the Lonsdale is relatively simple and the fabric was on sale, I think I'm going to go straight to fashion fabric. Wish me luck!
I'm absolutely in love with this skirt. It's by far the best and most comfortable, wearable thing I've ever made.
The fabric is a wool crepe I picked up on clearance in the summer. Locals might recognize it - there were still bolts of it available at the Boxing Day sale! Either they had stocked way too much of it, or I'm just the only person in Vancouver who actually wanted to buy bright fuchsia wool. In any case, it was the best of all worlds because it was a fabric I actually wanted to work with at a price that let me justify approaching this as a "wearable muslin."
I'm very glad I approached it that way, because this project felt so much more straightforward and fun. I fall between a size 8 and 10, but closer to the 10, so I followed Colette's advice and cut that size. In the end, it was too large and I had to take in two inches all over (I simply took in the side seams). Otherwise, the fit is perfect. The proportions are correct and I absolutely love the straight silhouette - not pencil, not a-line. I love it so much, I plan to turn it into a TNT pattern with a solid front and a side zip. I also want to make another true-to-pattern version in a more neutral colour.
I lined it with bemberg rayon and actually really enjoyed working with it - perhaps I'd just heard too many horror stories so my expectations were low. The only real mistake I made was picking too dark a colour. In person you can see where the lining meets the facing although, happily, the belt distracts enough that it's not really an issue. I had already hemmed this once, before realizing it definitely needed taking in, and I did the machine "invisible" hem. It was a little too visible, so this time I did it by hand. I chose to omit the twill tape in the waist, which I may regret, but I didn't have it on hand and wasn't willing to make another trip!
My next project is a dress (Lonsdale), and I'm trying to decide how to approach it. After this experience, I'm really keen to continue forgoing the muslin altogether. It really does drain a lot of the fun out of sewing for me. I suppose ultimately it depends on the complexity of the pattern and the cost of materials. Since the Lonsdale is relatively simple and the fabric was on sale, I think I'm going to go straight to fashion fabric. Wish me luck!
Thursday, January 12, 2012
Fuchsia
As promised, here's a sneak peek at my next project. Can you guess what it is?
Well, no need to guess, because I'm going to tell you. And, what better way to tell you than via croquis?
I'm making this out of a length of bright fuchsia wool crepe that I picked up from Fabricana on clearance. I originally had it in mind for a dress, until I realized the likelihood of my ever wearing a fuchsia dress with regularity was pretty slim. A skirt, on the other hand, has potential. In the past the high waist would have worried me, but I've been trying to wear more skirts up there and get used to it, and it's going well so far.
I've been trying to get better at moderation, and I'm pleased to say that I haven't put more than 2-4 solid hours into this baby in one sitting. That's a big step, for me! I'm surprised at how much more I'm enjoying the project by handling it this way. No more burnout or frustration. Win!
This project has been pretty fun to make, although attaching to the lining to the facing did intimidate me into procrastinating for a week or two. (In the end, it wasn't so bad.) I'm almost finished now - all that I need to do is cover the buttons and sew the buttonholes. Here's hoping I don't garble the whole thing! I used the blind hem foot on my machine for the first time, and while it's not exactly invisible, I can handle the imperfection in exchange for the ease and speed. Ten minute hem? Yes, please!
I have one confession that I may regret admitting - I didn't do any fitting. At all. Not even a tissue fit, let alone a muslin. I realized that all the obsessing about fit really stole the joy from sewing for me last year, so I resolved to scale it back a bit. Obviously I wouldn't take this route for a more complex or fitted pattern, but I figured a straight skirt that matches my waist and hip measurements was a relatively safe bet. (Especially knowing that other Colette patterns I've tried have fit large, rather than small.) I'm pleased to report that it seems, so far, like a success! But I suppose I should reserve judgement until I get the buttons on. Wish me luck!
Well, no need to guess, because I'm going to tell you. And, what better way to tell you than via croquis?
I'm making this out of a length of bright fuchsia wool crepe that I picked up from Fabricana on clearance. I originally had it in mind for a dress, until I realized the likelihood of my ever wearing a fuchsia dress with regularity was pretty slim. A skirt, on the other hand, has potential. In the past the high waist would have worried me, but I've been trying to wear more skirts up there and get used to it, and it's going well so far.
I've been trying to get better at moderation, and I'm pleased to say that I haven't put more than 2-4 solid hours into this baby in one sitting. That's a big step, for me! I'm surprised at how much more I'm enjoying the project by handling it this way. No more burnout or frustration. Win!
This project has been pretty fun to make, although attaching to the lining to the facing did intimidate me into procrastinating for a week or two. (In the end, it wasn't so bad.) I'm almost finished now - all that I need to do is cover the buttons and sew the buttonholes. Here's hoping I don't garble the whole thing! I used the blind hem foot on my machine for the first time, and while it's not exactly invisible, I can handle the imperfection in exchange for the ease and speed. Ten minute hem? Yes, please!
I have one confession that I may regret admitting - I didn't do any fitting. At all. Not even a tissue fit, let alone a muslin. I realized that all the obsessing about fit really stole the joy from sewing for me last year, so I resolved to scale it back a bit. Obviously I wouldn't take this route for a more complex or fitted pattern, but I figured a straight skirt that matches my waist and hip measurements was a relatively safe bet. (Especially knowing that other Colette patterns I've tried have fit large, rather than small.) I'm pleased to report that it seems, so far, like a success! But I suppose I should reserve judgement until I get the buttons on. Wish me luck!
Wednesday, January 11, 2012
Paper Dolls
The act of drawing a dress on a croquis reminds me of playing with paper dolls when I was little. Which suddenly makes it a lot more appealing!
In general, I consider myself to be much better at manipulating than I am at creating things from thin air... but I suppose trying to copy a line drawing freehand isn't exactly high art, and I should be able to get the hang of it eventually. Right?
With that in mind, I tried to draw a little something on my croquis, loosely following this tutorial from the lovely Alana of Lazy Stitching. This is what I came up with:
I can immediately see the benefit of this activity. It's so much easier to visualize what the proportions of the garment will look like on my figure! (In this case, I feel much more confident that B5707 will look good on me.) Between the paper-doll-esque fun and the practical benefit (and the fact that this actually took very little time), I can see this becoming something I will actually take the time to do.
I'm very grateful for my little tablet, which was a gift from my fantastic brother a few years back. Until now I've used it exclusively for photo editing, but it definitely made doing this about 100x easier and would be well worth the price if you were interested in digital drawing!
Anyway, lest you think I'm just piddling around on the internet these days, I actually have a skirt nearing completion. Tomorrow I'll take some in-progress photos and show them to you. I fell into the habit of only showing finished objects last year, but I'm thinking this year a little more detail might be fun. (Even if it means actually owning up to project failures!) So, stay tuned!
In general, I consider myself to be much better at manipulating than I am at creating things from thin air... but I suppose trying to copy a line drawing freehand isn't exactly high art, and I should be able to get the hang of it eventually. Right?
With that in mind, I tried to draw a little something on my croquis, loosely following this tutorial from the lovely Alana of Lazy Stitching. This is what I came up with:
I can immediately see the benefit of this activity. It's so much easier to visualize what the proportions of the garment will look like on my figure! (In this case, I feel much more confident that B5707 will look good on me.) Between the paper-doll-esque fun and the practical benefit (and the fact that this actually took very little time), I can see this becoming something I will actually take the time to do.
I'm very grateful for my little tablet, which was a gift from my fantastic brother a few years back. Until now I've used it exclusively for photo editing, but it definitely made doing this about 100x easier and would be well worth the price if you were interested in digital drawing!
Anyway, lest you think I'm just piddling around on the internet these days, I actually have a skirt nearing completion. Tomorrow I'll take some in-progress photos and show them to you. I fell into the habit of only showing finished objects last year, but I'm thinking this year a little more detail might be fun. (Even if it means actually owning up to project failures!) So, stay tuned!
Tuesday, January 10, 2012
Croquis Bandwagon
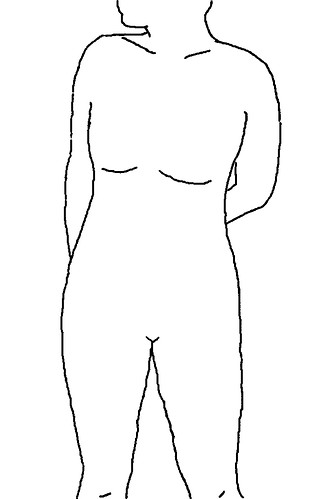
I've been intrigued by all the little personaized croquis drawings that have been popping up around the blogosphere. I wasn't sure if I wanted to try my hand at it, but then Lladybird posted a tutorial on how to make one and I had to give it a go. I didn't want to bother taking a new photo, so I just picked the closest thing I already had on file. It's missing my head and my legs below the knee, but otherwise it seemed like a good shot to use as a rough draft.
My inner photo-editing dork enjoyed making this, enough so that I think I'll take a better photo and try again later. But the real question is: will it actually prove to be useful? To date I haven't bothered doing things like making digital colour palettes or Pinterest inspiration boards, so my track record doesn't bode well. But hey, you never know until you try!
Have you made your own croquis? Do you make inspiration boards and/or colour palettes, or otherwise organize your creative self digitally? If so, have you found it useful?
My inner photo-editing dork enjoyed making this, enough so that I think I'll take a better photo and try again later. But the real question is: will it actually prove to be useful? To date I haven't bothered doing things like making digital colour palettes or Pinterest inspiration boards, so my track record doesn't bode well. But hey, you never know until you try!
Have you made your own croquis? Do you make inspiration boards and/or colour palettes, or otherwise organize your creative self digitally? If so, have you found it useful?
Tuesday, November 1, 2011
Sorbetto Redux
As my silence may have hinted, I've been in a bit of a sewing funk. Everything just started to feel like it was taking too long and not fitting correctly. Add in some shifting of life's priorities (i.e. amping up the job search, among other things) and I just let it take the back burner for a while. But I wanted to get myself out of the rut so I decided to take this pretty cotton/silk voile out of the cupboard and whip it into a quick Sorbetto.
Well, "quick" isn't really the right word. In truth, this thing took forever. Yet again, I struggled with moderation, made a ton of mistakes (sewing bindings on inside-out, etc), and ended up feeling like my whole day got sucked into sewing. (Because it did. 9:30am I was printing the pattern pieces, 10:30pm I was pressing the hem. Although, in fairness, there was some eating in there somewhere.)
But, ultimately there was success. First, it fits! Second, it fit with much less annoyance than the last time. I still fall between sizes. However, rather than making the larger size (like last time, as recommended by Colette) and then having to add a pleat in the back, I simply made the smaller size (size 8) and... that was it. Ta-da! It fits. I still had to lower/shorten the dart, add some length, and take an inch off the hips... but otherwise, it's pretty darn good.
(Actually, I ended up having to remove even more length from the dart this time... almost 2". Is that a large bust thing? I can't imagine that length of dart being appropriate on anybody... but then again, I guess I really only know my own body.)
In a perfect world, I would figure out how to do a small FBA on this, as it it doesn't have much ease in the bust. I would also probably lower the neckline a little... as someone who generally wears either scandelously low necklines or crewnecks/boatnecks, this feels a bit in-between. However, I may just get used to it. Time will tell! Lest I sound negative, I actually think this might be the first truly wearable item I've sewn (pajama pants aside).
I've put myself on a rather strict unemployment budget so if I remain inspired to sew then it's time to get going on my Lonsdale and Bombshell... because they're the only projects I have the fabric for! Unless I cop out and finally make that apron I've been planning, but I can't find a pattern I like and I'm not feeling up to the task of drafting. (Which I realize is totally ridiculous, considering the simplicity of the project. I just want one project that's a straightforward cut-and-sew, you know?)
However, there will be knitting updates soon. The two secret projects will be gifted soon (and therefore no longer secret) and a pair of long-hibernating socks is now nearing the finish line. It seems the more sewing I do, the more it affirms my love of knitting. Comfort zones, I suppose.
Wednesday, July 20, 2011
Sorbetto Love
Yesterday I decided to make this light and summery top, and I went full-steam ahead without a muslin. It's not perfect (as usual!), but I think the beauty of a simple, loose fit like this is that it doesn't have to be perfect. In fact, regardless of the fit dissection I'm about to delve into below, this might be the first piece I've made that could actually make it into regular wearing rotation. (Well, besides the pajamas.)
The fabric is some light-ish weight semi-sheer cotton I picked up at the Fabricana Canada Day sale. (Not sure what kind... heavier than voile, lighter than broadcloth/quilting cotton?) In addition to the fit changes, I added 1.5" to the length of the top and I'm quite glad I did. (I could see that this would be unnecessary if you were the type of person who enjoyed tucking things into high waists. I am not that person, however.)
Based on the measurements I cut the size 10, following Colette's advice to use the larger size if you fall between sizes. This didn't work out as well as it should have. The front was almost exactly the right size, but the back was huge and billowy and just way too large. Rather than pick out any seams, I decided to simply mimic the front by creating a 1" box pleat on the back piece. This ate up 2" of fabric and I'm now very happy with the fit through the body.
The only problem with this quick-fix pleat was that it messed up the fit of the shoulders. In the front, the shoulder straps sit a smidge too wide. In the back, after the pleat was put in, they sit a smidge too narrow. Neither of these problems is really noticeable on their own, but it means that when the straps attach at the shoulders they kind of want to tug each other in the wrong direction. As a result, the straps in the back look a bit like they're pulling (although they're not too tight) and the neckline in the front gapes a bit (from the straps being pulled in). (This isn't really visible in the photos.)
I think the solution on future versions would be simply to cut a smaller size and do an FBA. But ugh - between the loose fit and the fact that Colette cuts for a larger cup size, it seems silly. But I suppose using patterns drafted for a C-cup still isn't a perfect solution when one is an F-cup...
Regarding the bust, the only alteration I had to make was shortening and lowering the bust dart. I shortened it by 1" and lowered it by 0.5" and I think it's just about perfect. I've never made a darted front before, and after all my previous experiences messing around with princess seams and gathers, it seemed almost ridiculously simple. Love darts!
I'm definitely going to make new versions of this top and try to perfect the fit, because it's such a great base for embellishment. I'd love to have a whole collection of them around for summertime.
Saturday, July 9, 2011
Comfy Crescent
I know, I know... when it comes to clothes, the general consensus seems to be that "comfortable" and "stylish" are mutually exclusive. It's like that conversation in When Harry Met Sally:
Jess: So you're saying she's not that attractive.
Harry: No, I told you she is attractive.
Jess: Yeah but you also said she has a good personality.
Harry: She has a good personality.
[Jess stops walking, turns to Harry, raises his arms in the air]
Harry: What?
Jess: When someone's not that attractive, they're always described as having a good personality.
Harry: Look, if you had asked me what does she look like and I said, she has a good personality, that means she's not attractive. But just because I happen to mention that she has a good personality, she could be either. She could be attractive with a good personality, or not attractive with a good personality.
Jess: So which one is she?
Harry: Attractive.
Jess: But not beautiful, right
Okay, the brilliant wit of Billy Crystal aside, I have to respectfully disagree with the comfortable /=/ stylish thing. I know I'm more of a craft blogger than a style blogger, but while I may not be a fashionista by any stretch of the imagination, I do actually pride myself on knowing when I look good, when I look passable, and when I'm an embarrassment. The thing is... I just don't always care. However, I think this skirt is pretty damn cute. And comfortable. At the same time!
So yes, I'll confess: it's made out of flannel. Flannel shirting, not pajama flannel. (I'll further confess I don't actually know what the difference is, but that's what the tags said and I'm sticking to it.) More stylish folks than me may be laughing at me through their screens, but seriously dude... don't knock it 'til you've tried it. And don't worry... I'm not expecting this to be evening wear. Just something comfy besides bermuda shorts to wear on a lazy sunday.
I thought the fabric had a sort of denim-appeal so I did some contrast topstitching in navy and used a navy and brass zipper, although I thoroughly botched the insertion. I'm not sure where I went wrong (perhaps just the bulk of the fabric threw me) but one side sits noticeably higher than the other! Oh well, no big deal.
My previous Crescent (View B) was graded from an 8 at the hips to a 10 at the waist, with 1" removed from the top. I still felt this sat a little too high for my taste, so this time around (View A) I graded from an 8 at the hips to a 12 at the waist. This added about an inch around the waist (not the full 1.5" the pattern would have you believe, because I've also removed that inch from the top, so it's not fully graded out to the 12). It's perfection. Serious perfection. I couldn't ask for it to fit any more comfortably. It actually doesn't really sit much further down, it's just a more correct grade for the slope of my hip and so it just sits more smoothly.
Anyway, I love it. But in case I haven't sold my more stylish readers, let my try to convince you with my best snugbug impression (Patty always sells it, doesn't she?):
OH! And in other news, I hit a major blogging milestone the other day: I was recognized by a reader/fellow sewist! Commenter Alice spotted me out at the Fabricana Canada Day sale! Thanks Alice, you made my day! (Alice doesn't yet have a blog, but she tells me she's working on it. Keep your eye on the comments for a linky, as I made her promise to share the address once she's started one. How's that for peer pressure? LOL.)
Tuesday, June 21, 2011
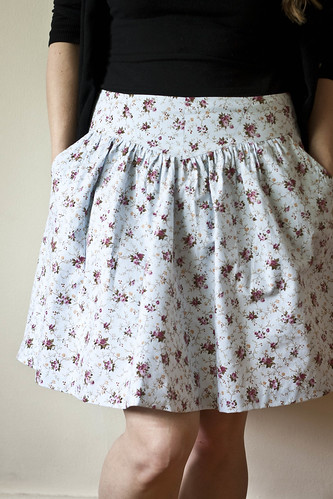
Crescent Skirt - Finished!
I'm so excited to finally show off my Crescent skirt!
This was meant to be View C... but when I laid out my fabric to cut it out, I realized that it was only 42" wide instead of 44", which was too narrow! What's up with that? Is that a quilting cotton thing? Anyway, I improvised by cutting View B, but extending the hem all the way down to the size 16 length. It worked well enough, and I'm actually super happy with it - I think any longer would have been too long on me.
As I mentioned in previous posts, the modifications I made were to cut 1" off the top of the waistband, and to grade the waistband pieces from an 8 at the hip to a 10 at the waist. My hope was that these two modifications would bring the skirt down to a more tolerable place for me to wear it, seeing as I find things sitting on my natural waist completely uncomfortable. (I am seriously a child of the low-rise generation!) I failed, however, to consider the fact that my muslin was not interfaced and had no twill tape... so this didn't work out quite as well as I'd expected. It's still a tad high for my comfort, but I figure it'll be a good piece to help me try to get used to things sitting higher. We'll see how that goes!
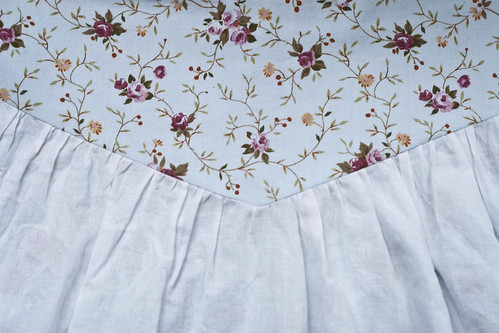
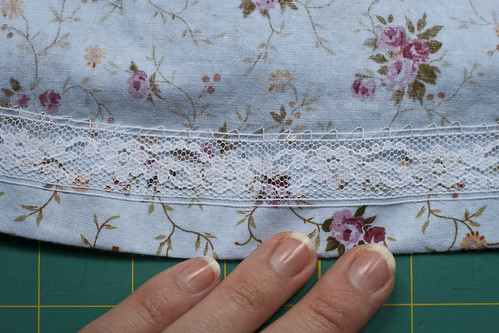
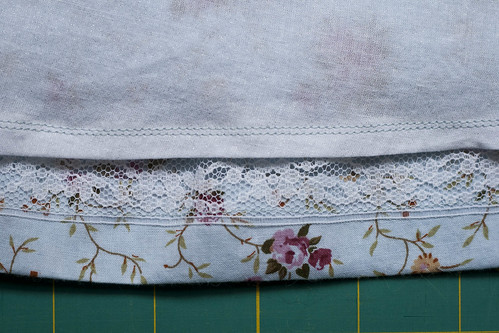
A few detail shots...
I lined this with a white/silver voile. You can't really see it, but it has a silver sheen when the light hits it. It's actually quite pretty, honest!
The lace hem facing worked out great and really spoke to my inner perfectionist... it's so easy to make evenly spaced hand stitches when you have a patterned lace to follow! In retrospect this would have looked fine machine-stitched and that would have saved me a lot of time. Oh well... I do love hand-stitching :)
That double line of stitching on the lining hem was just because I didn't get close enough to the edge the first time around. Oops!
This method of zipper insertion was positively magical... thanks, Tasia! (Mine doesn't line up perfectly but I couldn't care less!)
Time will tell if this skirt sees a lot of wear, between the fabric (not my usual style) and the fit. Regardless, I still love it and I'm already plotting my next version. (View A, which I think will be a little more wearable for me.) I'm just trying to debate the best way to tackle the fit issue. I'm torn between fussing with the grading (maybe from an 8 at the hips to a 12 at the waist? Would that be crazy?) or maybe just omitting the twill tape at the waistline and seeing if that allows a little more stretch? Hmm... let me know if you have any suggestions!
(Also: every skirt should have pockets, don't you think? So great!)
This was meant to be View C... but when I laid out my fabric to cut it out, I realized that it was only 42" wide instead of 44", which was too narrow! What's up with that? Is that a quilting cotton thing? Anyway, I improvised by cutting View B, but extending the hem all the way down to the size 16 length. It worked well enough, and I'm actually super happy with it - I think any longer would have been too long on me.
As I mentioned in previous posts, the modifications I made were to cut 1" off the top of the waistband, and to grade the waistband pieces from an 8 at the hip to a 10 at the waist. My hope was that these two modifications would bring the skirt down to a more tolerable place for me to wear it, seeing as I find things sitting on my natural waist completely uncomfortable. (I am seriously a child of the low-rise generation!) I failed, however, to consider the fact that my muslin was not interfaced and had no twill tape... so this didn't work out quite as well as I'd expected. It's still a tad high for my comfort, but I figure it'll be a good piece to help me try to get used to things sitting higher. We'll see how that goes!
A few detail shots...
I lined this with a white/silver voile. You can't really see it, but it has a silver sheen when the light hits it. It's actually quite pretty, honest!
The lace hem facing worked out great and really spoke to my inner perfectionist... it's so easy to make evenly spaced hand stitches when you have a patterned lace to follow! In retrospect this would have looked fine machine-stitched and that would have saved me a lot of time. Oh well... I do love hand-stitching :)
That double line of stitching on the lining hem was just because I didn't get close enough to the edge the first time around. Oops!
This method of zipper insertion was positively magical... thanks, Tasia! (Mine doesn't line up perfectly but I couldn't care less!)
Time will tell if this skirt sees a lot of wear, between the fabric (not my usual style) and the fit. Regardless, I still love it and I'm already plotting my next version. (View A, which I think will be a little more wearable for me.) I'm just trying to debate the best way to tackle the fit issue. I'm torn between fussing with the grading (maybe from an 8 at the hips to a 12 at the waist? Would that be crazy?) or maybe just omitting the twill tape at the waistline and seeing if that allows a little more stretch? Hmm... let me know if you have any suggestions!
(Also: every skirt should have pockets, don't you think? So great!)
Tuesday, June 14, 2011
Sneak Preview
Crescent skirt is almost done! I'm dying to finish hemming it and show it off, but Mr. Modiste is back in town for four days so I'm a little short on spare time!
Rather than making a size larger, I heeded K.Line's advice from my Crescent Skirt Muslin post and simply made the waistband an inch narrower, cutting an it off at the top. The skirt still sits a little bit higher than I want it to, but not uncomfortably so. I followed the pattern to the letter and so I included the twill tape in the waistband, which I probably shouldn't have done. I know that's to prevent stretching and really, I wouldn't have minded a little ease at the waist! But I think it'll be okay.
I decided to try using lace hem facing, but in a moment of stupidity I left my iron on hot and melted a bunch of little holes into the border. My inner perfectionist is screaming at me to remove it and start again, but it doesn't compromise the integrity of the hem so I think I might try to silence that voice and just leave well enough alone. What do you think? Is it worth fixing?
Full post with details in the next few days!
Sunday, May 1, 2011
Crescent Skirt Muslin
10 points to anyone who can identify the problem here:
But we'll go by the honour system, because I'm going to tell you anyway: why on earth would I make another skirt that sits on my natural waistline? Fail, fail,fail. I checked the measurement chart and traced the pattern, grading from a 10 in the waist to an 8 in the hips (which worked out perfectly), without ever pausing to consider the relatively-high-waisted-ness! Silly me.
Clearly I should have gone up a size or two in order to allow for the skirt to sit lower. After letting out some seams and playing with the closure in the back, I'm thinking I need about 2 more inches of ease for it to sit where I want it to. The only trouble is, one size up adds 1.5", and two sizes up adds 3". Which to do?
I suppose the larger, and then I can simply take it in, rather than having to mess around adding tissue to pattern pieces? Or maybe I'll like that extra inch of ease after all? Probably wise, as I don't have the fabric or patience to cut a second muslin.
Regardless, how cute is this pattern? And how fun to sew? Love it!
But we'll go by the honour system, because I'm going to tell you anyway: why on earth would I make another skirt that sits on my natural waistline? Fail, fail,fail. I checked the measurement chart and traced the pattern, grading from a 10 in the waist to an 8 in the hips (which worked out perfectly), without ever pausing to consider the relatively-high-waisted-ness! Silly me.
Clearly I should have gone up a size or two in order to allow for the skirt to sit lower. After letting out some seams and playing with the closure in the back, I'm thinking I need about 2 more inches of ease for it to sit where I want it to. The only trouble is, one size up adds 1.5", and two sizes up adds 3". Which to do?
I suppose the larger, and then I can simply take it in, rather than having to mess around adding tissue to pattern pieces? Or maybe I'll like that extra inch of ease after all? Probably wise, as I don't have the fabric or patience to cut a second muslin.
Regardless, how cute is this pattern? And how fun to sew? Love it!
Wednesday, April 20, 2011
The Naked Pencil Skirt - (Mostly) Finished
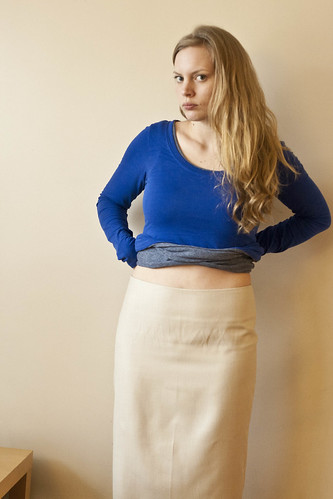
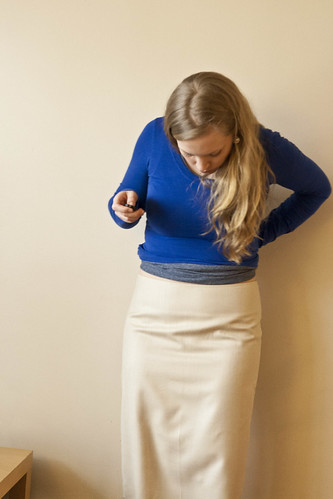
Lest you think I haven't been up to anything, I thought I'd share the (mostly) finished pencil skirt. I still haven't hemmed it... and now, you'll see why! (Beware: the lack of pressing may reveal my general apathy toward this garment!)
You see, it had potential:
However, the slightest movement caused this to happen:
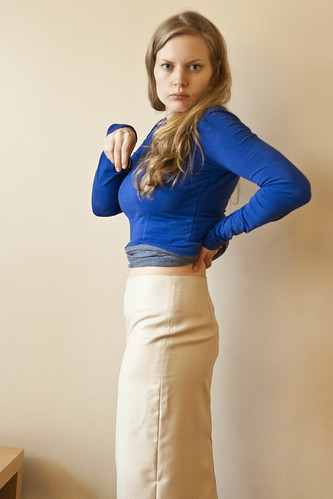
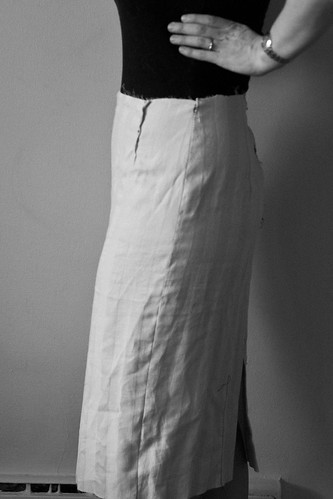
Basically, it seems the "problem" here is that the area around the level of my hip sockets is shallower than my stomach and my thighs. As you can see, this "problem" extends all the way around to the back:
(I say "problem" with quotation marks because the real problem, of course, is not my body, but rather my inexperience with fitting/sewing!)
You might remember that I originally posted that it was too small. Well, that was actually mostly the result of my attempt to fix this wrinkling issue. I tried taking in the extra fabric at the side seams, but mainly it just made the skirt too tight without properly resolving the issue. However, after letting that back out, the thighs are still a tad snug at the top.
Anyway, so it's not exactly a winner. That makes me a little sad, because I really did love this fabric. But then again, as I said in my previous post, I'm kind of proud of all the little details I learned while making this skirt. For example...
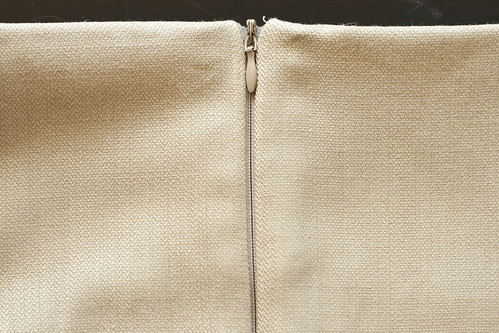
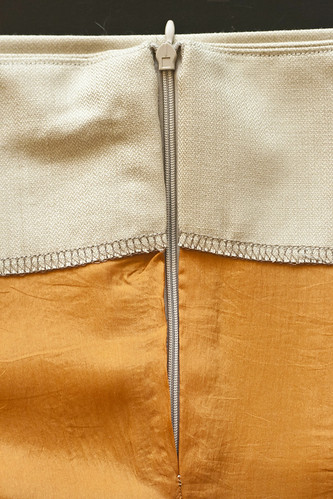
Invisible zip (not perfect, but not bad!):
(I mostly followed the Cupcake Goddess's tutorial for this, but I omitted the stabilizer. However, her suggestion to press the seam allowance over was exactly what all the other tutorials were missing. Genius.)
Understitching:
(Tasia's tutorial was extremely helpful.)
Adding a lining/facing:
(I used this tutorial from Threads for adding the facing/lining as I did, although if I were to do this skirt again I would omit the facing and just understitch the lining so it didn't show. The facing definitely shows through the front of the skirt in this fabric. Also, I couldn't find a single tutorial that mentioned how the heck to sew the facing/lining down on the inside next to the invisible zip... so I made up my own way, and it worked!)
Adding a back vent:
(I used this tutorial, and this tutorial, both from the Cupcake Goddess.)
And that's that. My little skills-sampler of an ill-fitting skirt. Perhaps one day I'll try tackling the pencil skirt again, but for now I think I'm going to say goodbye to pencil skirts and silk charmeuse and focus on simpler and more gratifying beginner projects. I think "go big or go home" was a good attitude to jump in with, but at this point I'm dying for a finished garment that I'm enthusiastic about!
With that in mind, I'm going to start the Crescent Skirt sew-along. It won't be boring, but it's an easier fabric and a more forgiving style, don't you think?
(Also, for those of you who saw my deleted post about wedding dress size selection, which I'm told was cached in some people's RSS readers after I deleted it: I figured it out. I decided to stop the cycle of anxiety and just go straight to my trusted neighbour/surrogate mom/seamstress and ask her expert opinion. She recommended the smaller size. Done and done!)
You see, it had potential:
However, the slightest movement caused this to happen:
Basically, it seems the "problem" here is that the area around the level of my hip sockets is shallower than my stomach and my thighs. As you can see, this "problem" extends all the way around to the back:
(I say "problem" with quotation marks because the real problem, of course, is not my body, but rather my inexperience with fitting/sewing!)
You might remember that I originally posted that it was too small. Well, that was actually mostly the result of my attempt to fix this wrinkling issue. I tried taking in the extra fabric at the side seams, but mainly it just made the skirt too tight without properly resolving the issue. However, after letting that back out, the thighs are still a tad snug at the top.
Anyway, so it's not exactly a winner. That makes me a little sad, because I really did love this fabric. But then again, as I said in my previous post, I'm kind of proud of all the little details I learned while making this skirt. For example...
Invisible zip (not perfect, but not bad!):
(I mostly followed the Cupcake Goddess's tutorial for this, but I omitted the stabilizer. However, her suggestion to press the seam allowance over was exactly what all the other tutorials were missing. Genius.)
Understitching:
(Tasia's tutorial was extremely helpful.)
Adding a lining/facing:
(I used this tutorial from Threads for adding the facing/lining as I did, although if I were to do this skirt again I would omit the facing and just understitch the lining so it didn't show. The facing definitely shows through the front of the skirt in this fabric. Also, I couldn't find a single tutorial that mentioned how the heck to sew the facing/lining down on the inside next to the invisible zip... so I made up my own way, and it worked!)
Adding a back vent:
(I used this tutorial, and this tutorial, both from the Cupcake Goddess.)
And that's that. My little skills-sampler of an ill-fitting skirt. Perhaps one day I'll try tackling the pencil skirt again, but for now I think I'm going to say goodbye to pencil skirts and silk charmeuse and focus on simpler and more gratifying beginner projects. I think "go big or go home" was a good attitude to jump in with, but at this point I'm dying for a finished garment that I'm enthusiastic about!
With that in mind, I'm going to start the Crescent Skirt sew-along. It won't be boring, but it's an easier fabric and a more forgiving style, don't you think?
(Also, for those of you who saw my deleted post about wedding dress size selection, which I'm told was cached in some people's RSS readers after I deleted it: I figured it out. I decided to stop the cycle of anxiety and just go straight to my trusted neighbour/surrogate mom/seamstress and ask her expert opinion. She recommended the smaller size. Done and done!)
Wednesday, April 6, 2011
Pencil Skirt Muslin
I put together a muslin for my pencil skirt the other day. I'm working with my first Burda pattern, 8155. It went together in a snap and just needed a few minor changes.
First, there was too much ease in the hips, so I took it in about 1cm there and down the length of the skirt. Second, I had to admit that I just don't like skirts sitting on my natural waist. I'm too short-waisted and frankly, I find it uncomfortable. I decided to just remove the waistband altogether, and that helped immensely. So, this means that I'll have to draft a facing, but that's no big deal.
I'm definitely getting crinkles at the point where my legs meet my torso, which Fit For Real People says can be fixed by simply removing the front darts. I tried unpinning them, but then the waist is too big. I'm not sure if the answer is just to take in the waist a bit at the side seam? (Or, considering I've already taken the skirt in at the hip, just make the whole thing in a size smaller and omit the front darts?)
I was interested to see that at least one person who's made up this pattern noted that it sits higher in the front than the back. I'm not sure if that's a problem with the pattern, or if that person just has a very similar figure to mine, but I noticed this as well. In these photos, I've removed about 5/8" from the front of the skirt and it's now sitting about level.
So, I guess my next step is just to play around and figure out how exactly to handle those front crinkles, and then draft a facing and be on my merry way. The good news is, once I removed the waistband and wore the skirt lower, it was actually super comfortable. Old habits die hard, I guess!
First, there was too much ease in the hips, so I took it in about 1cm there and down the length of the skirt. Second, I had to admit that I just don't like skirts sitting on my natural waist. I'm too short-waisted and frankly, I find it uncomfortable. I decided to just remove the waistband altogether, and that helped immensely. So, this means that I'll have to draft a facing, but that's no big deal.
I'm definitely getting crinkles at the point where my legs meet my torso, which Fit For Real People says can be fixed by simply removing the front darts. I tried unpinning them, but then the waist is too big. I'm not sure if the answer is just to take in the waist a bit at the side seam? (Or, considering I've already taken the skirt in at the hip, just make the whole thing in a size smaller and omit the front darts?)
I was interested to see that at least one person who's made up this pattern noted that it sits higher in the front than the back. I'm not sure if that's a problem with the pattern, or if that person just has a very similar figure to mine, but I noticed this as well. In these photos, I've removed about 5/8" from the front of the skirt and it's now sitting about level.
So, I guess my next step is just to play around and figure out how exactly to handle those front crinkles, and then draft a facing and be on my merry way. The good news is, once I removed the waistband and wore the skirt lower, it was actually super comfortable. Old habits die hard, I guess!
Monday, March 14, 2011
Aquaphobia Socks
This FO felt like it was a long time coming, but it was well worth the wait.
The Details:
Pattern: Aquaphobia Socks by Crystal Smith
Needles: US1(2.5mm) 36" Addi Turbo circulars (dislike!)
Yarn: SweetGeorgia Yarns' Tough Love Sock (80% wool/20% nylon) in Lakeshore Drive
Gauge: 10sts/inch in the slip stitch pattern
Cast on: February 4, 2011
Bound off: March 14, 2011
Total # of stitches: 30,728 (or thereabouts)
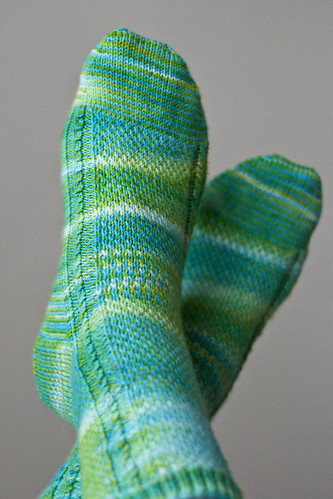
I absolutely love this pattern, although it was a bit slow-going with all of those slipped stitches. It fit like a dream without any modifications, which was particularly nice! My favourite part is that the pattern didn't need following, at all - it's straightforward enough that you can simply read your knitting. Win.
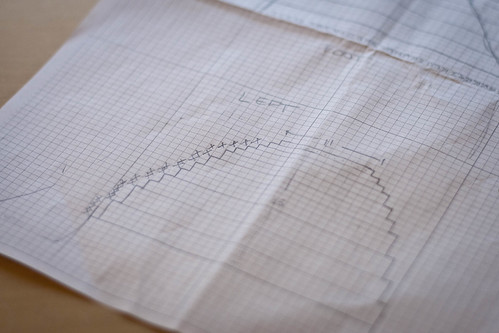
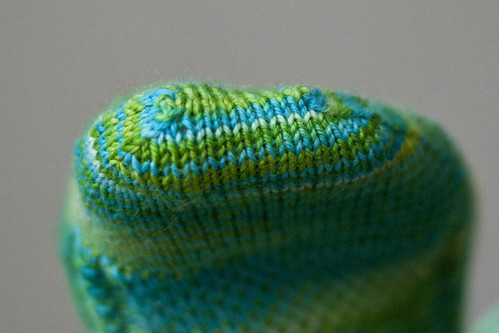
The only complaint I had with the pattern was some rather vague toe instructions. Although, it eventually became clear that I'm just a picky knitter (and sock-wearer). I tried and frogged three toes before settling on this one, and it was definitely worth it. This is a moderately anatomically correct toe, created simply by tracing the outline of my toes on some knitter's graph paper. (Good instructions here.) I didn't go as correct as I could have - a first try let me know that I didn't want such a close fit. So the effect is rather subtle, but so much more comfortable for me than a traditional toe.
During my research on the subject of toes, I also discovered a really handy trick to make the edges of the graft much prettier. Once you're done your knitting, but before you start grafting, pass the end stitches on both ends of each needle over the stitches beside them, toward the centre of the graft. You'll end up with four less stitches to graft, but the result will be so much neater. (Rox on Ravelry describes this more accurately here and here.)
I knitted these on one of my few pairs of Addi Turbos, and was reminded that I don't really care for these needles. On the occasion that a stitch would slip off the needles, the tips were too blunt to recapture it! So I'd have to use the tip of a stitch holder or a tapestry needle. How silly. I'm anxiously awaiting the delivery of some sock-sized KnitPicks Harmonies.
That small irritation aside, I had so much fun knitting these. My feet are very happy tonight.
The Details:
Pattern: Aquaphobia Socks by Crystal Smith
Needles: US1(2.5mm) 36" Addi Turbo circulars (dislike!)
Yarn: SweetGeorgia Yarns' Tough Love Sock (80% wool/20% nylon) in Lakeshore Drive
Gauge: 10sts/inch in the slip stitch pattern
Cast on: February 4, 2011
Bound off: March 14, 2011
Total # of stitches: 30,728 (or thereabouts)
I absolutely love this pattern, although it was a bit slow-going with all of those slipped stitches. It fit like a dream without any modifications, which was particularly nice! My favourite part is that the pattern didn't need following, at all - it's straightforward enough that you can simply read your knitting. Win.
The only complaint I had with the pattern was some rather vague toe instructions. Although, it eventually became clear that I'm just a picky knitter (and sock-wearer). I tried and frogged three toes before settling on this one, and it was definitely worth it. This is a moderately anatomically correct toe, created simply by tracing the outline of my toes on some knitter's graph paper. (Good instructions here.) I didn't go as correct as I could have - a first try let me know that I didn't want such a close fit. So the effect is rather subtle, but so much more comfortable for me than a traditional toe.
During my research on the subject of toes, I also discovered a really handy trick to make the edges of the graft much prettier. Once you're done your knitting, but before you start grafting, pass the end stitches on both ends of each needle over the stitches beside them, toward the centre of the graft. You'll end up with four less stitches to graft, but the result will be so much neater. (Rox on Ravelry describes this more accurately here and here.)
I knitted these on one of my few pairs of Addi Turbos, and was reminded that I don't really care for these needles. On the occasion that a stitch would slip off the needles, the tips were too blunt to recapture it! So I'd have to use the tip of a stitch holder or a tapestry needle. How silly. I'm anxiously awaiting the delivery of some sock-sized KnitPicks Harmonies.
That small irritation aside, I had so much fun knitting these. My feet are very happy tonight.
Saturday, March 12, 2011
Sencha: Muslin
Today was a quiet, beautiful day. I spent most of it on craft preparations. I wound nine skeins of Berroco Ultra Alpaca (six worsted and three fine), ironed the fabric for Pendrell 2.0 and Sencha, as well as some new muslin fabric (read: thrifted bedsheets).
I also ended up completing my Sencha muslin. I'm between sizes, but I followed the advice of the pattern and cut the larger size (size 10). Here's the result:
The fit, in general, is about right. I'm happy with the amount of ease (I could perhaps use a pinch more in the bust, but not much.) However, what the photo above might not illustrate properly is that the front is several inches shorter than the back. I'm not sure if that's inherent to the design, or a consequence of my own figure? Regardless, I would like to fix it, particularly because the blouse as-is (i.e. un-hemmed) is about an inch shorter in the front than I would like the finished blouse to be.
I'm inclined to place the blame on my bust. I know Colette patterns are designed for a larger bust (C instead of B?), but that's still several cup sizes below what I wear. At any rate, doing an FBA would certainly add length without distorting the bottom of the blouse... in fact, that's the only way I can figure on solving this. I'm not keen on adding any ease to the waist, so I would have to go down a size before making the adjustment.
Clearly, I don't really know enough about fitting yet, so if I'm way off track please do leave a comment and let me know. Or, if you think I've got it right, I'd love the affirmation! I'm going to sleep on it and read up in Fit For Real People in the meantime.
I also ended up completing my Sencha muslin. I'm between sizes, but I followed the advice of the pattern and cut the larger size (size 10). Here's the result:
The fit, in general, is about right. I'm happy with the amount of ease (I could perhaps use a pinch more in the bust, but not much.) However, what the photo above might not illustrate properly is that the front is several inches shorter than the back. I'm not sure if that's inherent to the design, or a consequence of my own figure? Regardless, I would like to fix it, particularly because the blouse as-is (i.e. un-hemmed) is about an inch shorter in the front than I would like the finished blouse to be.
I'm inclined to place the blame on my bust. I know Colette patterns are designed for a larger bust (C instead of B?), but that's still several cup sizes below what I wear. At any rate, doing an FBA would certainly add length without distorting the bottom of the blouse... in fact, that's the only way I can figure on solving this. I'm not keen on adding any ease to the waist, so I would have to go down a size before making the adjustment.
Clearly, I don't really know enough about fitting yet, so if I'm way off track please do leave a comment and let me know. Or, if you think I've got it right, I'd love the affirmation! I'm going to sleep on it and read up in Fit For Real People in the meantime.
Wednesday, March 9, 2011
Pendrell 2.0: Planning
Yesterday, over Twitter, the lovely K-Line suggested that perhaps the FBA was unnecessary on my Pendrell. I have to admit, I'm pretty proud of how that turned out, so my knee-jerk reaction was, "no way!" However, after sleeping on it, I'm starting to wonder if she was onto something. I do love a good flow-y top that's forgiving in the waist... and that kind of top works well in charmeuse... and I'm not likely to be tucking this into anything high-waisted anytime soon...
... can you see where this is going?
I think I'm going to try making the top again, without the FBA and with slightly longer sleeve ruffles. Now, the only thing I'll need to decide is: what size to make?
I'm a bit perplexed on the subject of ease. Last time, I made a size 8. The FBA added 2" to the bust (but nothing to the waist because I removed the excess there). This means that my finished blouse has 2.5" ease in the bust and 5.5" in the waist. That doesn't sound like a lot in the bust, does it? But it doesn't look/feel too tight.
If I make a size 10, I'll have 2" of ease in the bust and 7" in the waist. That's 2" less than the designer intended for the bust, but spot on for the waist. (It's also 0.5" less in the bust than my first Pendrell.) However, if I were to go up to a size 12, I would have the recommended 4" of ease in the bust, but 8.5" in the waist. And who knows how wide the shoulders would be. (The size 8 shoulders fit perfectly.)
(Of course, the other alternative would be to make the size 8 again and do the FBA but don't remove the excess inches added to the waist. That would give me 2.5" ease in the bust and 7.5" in the waist.)
The mind, it boggles.
Thoughts?
... can you see where this is going?
I think I'm going to try making the top again, without the FBA and with slightly longer sleeve ruffles. Now, the only thing I'll need to decide is: what size to make?
I'm a bit perplexed on the subject of ease. Last time, I made a size 8. The FBA added 2" to the bust (but nothing to the waist because I removed the excess there). This means that my finished blouse has 2.5" ease in the bust and 5.5" in the waist. That doesn't sound like a lot in the bust, does it? But it doesn't look/feel too tight.
If I make a size 10, I'll have 2" of ease in the bust and 7" in the waist. That's 2" less than the designer intended for the bust, but spot on for the waist. (It's also 0.5" less in the bust than my first Pendrell.) However, if I were to go up to a size 12, I would have the recommended 4" of ease in the bust, but 8.5" in the waist. And who knows how wide the shoulders would be. (The size 8 shoulders fit perfectly.)
(Of course, the other alternative would be to make the size 8 again and do the FBA but don't remove the excess inches added to the waist. That would give me 2.5" ease in the bust and 7.5" in the waist.)
The mind, it boggles.
Thoughts?
Monday, March 7, 2011
Pencil Skirts: How Do They Work?
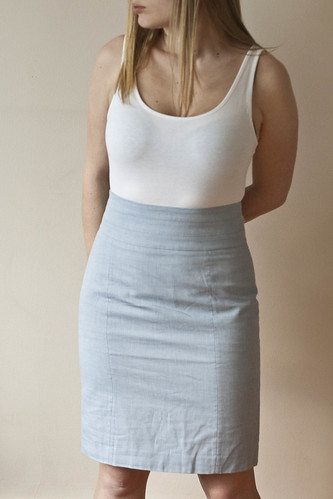
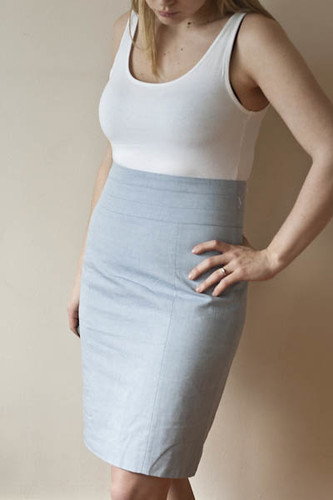
I bought my first high-waisted pencil skirt today. This is a funny area in the style/fit department for me: I think pencil skirts work with my body type but I'm not sure high-waisted does. However, this little number was too cute to resist. I figured it was worth bringing it home to analyze.
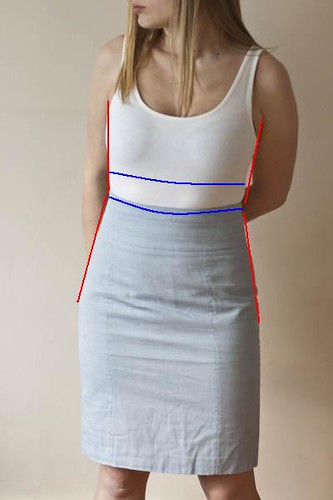
I have to admit, I think I'm a bit guilty here of picking the most flattering photo I took. Let's call the above the best-case scenario. For comparison, here's one that demonstrates my issues with the high-waist:
Generally, my issue is the fact that I'm short-waisted. That, and my rather large/low bust, means that a high waist only sits about two inches below an empire waist... which I just don't think is all that flattering. To my eyes, it tends to make me look more busty and less slim... which is sort of the opposite effect you'd want a pencil skirt to have, non?
Now, all that being said - I'm still not sure I bought this skirt in the right size. It's sitting a smidge above my natural waist and it's pretty snug... I can sit down, but barely. I'm wondering now if I perhaps should go back and try a larger size... it may sit better on my waist and give me a little more length, at the risk of becoming frumpy in the hips/thighs. Hmm.
Thoughts?
I have to admit, I think I'm a bit guilty here of picking the most flattering photo I took. Let's call the above the best-case scenario. For comparison, here's one that demonstrates my issues with the high-waist:
Generally, my issue is the fact that I'm short-waisted. That, and my rather large/low bust, means that a high waist only sits about two inches below an empire waist... which I just don't think is all that flattering. To my eyes, it tends to make me look more busty and less slim... which is sort of the opposite effect you'd want a pencil skirt to have, non?
Now, all that being said - I'm still not sure I bought this skirt in the right size. It's sitting a smidge above my natural waist and it's pretty snug... I can sit down, but barely. I'm wondering now if I perhaps should go back and try a larger size... it may sit better on my waist and give me a little more length, at the risk of becoming frumpy in the hips/thighs. Hmm.
Thoughts?
Friday, February 4, 2011
Progress Report
*crickets* *crickets*
I know it's been quiet around here. There hasn't been any sewing time, and I didn't want to overload this blog with filler posts.
Tonight I had the whole night at home, so I had some time to work on my Pendrell. I've started from scratch after the other one turned out so big. A while ago I traced out the pattern pieces for a size smaller (8). Tonight I finished tracing the pattern pieces, made a few tweaks and made up a new muslin. The result was the best so far. Here's what I did:
* lowered the full bust point by 1/2"
* 1" FBA (Fit For Real People method)
* took in 1" at the waist/hip (1/4" from both sides of both front princess seams)
* took in 1" from the hips (1/4" from each side of the each side seam)
* shortened hem by 1"
* lowered neckline by 3"
I know it sounds like a lot, but it really did result in a much better fit. Particularly when I threw caution to the wind, abandoned FFRP and just nipped in the princess seams below the bust. What a difference! On that note, I have to say... the jury is still out for me on the FFRP FBA. In addition to the excess ease at the waist, another problem that's arisen is some excess volume above the full bust. I'm not sure if I have a shallow chest, or if the FBA added volume where it wasn't needed, but there's definitely too much width on the front side panels above the full bust point. I'm not sure yet how I'm going to deal with it, but I know that I'd like to investigate some other full bust fit methods in the future. Any suggestions?
I did make one adjustment that proved totally unnecessary: taking in 1" total (1/4" from each side of each side back princess seam) from the low back, tapering 5 inches or so above and below. This was something I tried when I was working with the larger size and I'd though it helped, but I see now with the smaller size that it just looks and feels over-fit. I'll return that to the original pattern fit before making my final blouse.
Hopefully I'll get back to my normal schedule and fine some more sewing time in the coming week. In the meantime, I have some very exciting knitting to show you. (I knit on the bus and on my lunch hour, so it's a lot easier to keep knitting through the busy times!) Stay tuned for that over the weekend!
I know it's been quiet around here. There hasn't been any sewing time, and I didn't want to overload this blog with filler posts.
Tonight I had the whole night at home, so I had some time to work on my Pendrell. I've started from scratch after the other one turned out so big. A while ago I traced out the pattern pieces for a size smaller (8). Tonight I finished tracing the pattern pieces, made a few tweaks and made up a new muslin. The result was the best so far. Here's what I did:
* lowered the full bust point by 1/2"
* 1" FBA (Fit For Real People method)
* took in 1" at the waist/hip (1/4" from both sides of both front princess seams)
* took in 1" from the hips (1/4" from each side of the each side seam)
* shortened hem by 1"
* lowered neckline by 3"
I know it sounds like a lot, but it really did result in a much better fit. Particularly when I threw caution to the wind, abandoned FFRP and just nipped in the princess seams below the bust. What a difference! On that note, I have to say... the jury is still out for me on the FFRP FBA. In addition to the excess ease at the waist, another problem that's arisen is some excess volume above the full bust. I'm not sure if I have a shallow chest, or if the FBA added volume where it wasn't needed, but there's definitely too much width on the front side panels above the full bust point. I'm not sure yet how I'm going to deal with it, but I know that I'd like to investigate some other full bust fit methods in the future. Any suggestions?
I did make one adjustment that proved totally unnecessary: taking in 1" total (1/4" from each side of each side back princess seam) from the low back, tapering 5 inches or so above and below. This was something I tried when I was working with the larger size and I'd though it helped, but I see now with the smaller size that it just looks and feels over-fit. I'll return that to the original pattern fit before making my final blouse.
Hopefully I'll get back to my normal schedule and fine some more sewing time in the coming week. In the meantime, I have some very exciting knitting to show you. (I knit on the bus and on my lunch hour, so it's a lot easier to keep knitting through the busy times!) Stay tuned for that over the weekend!
Tuesday, January 11, 2011
Pendrell Blouse: Muslin #1
Well... I was wrong. I put together my muslin last night and the fit is way off!
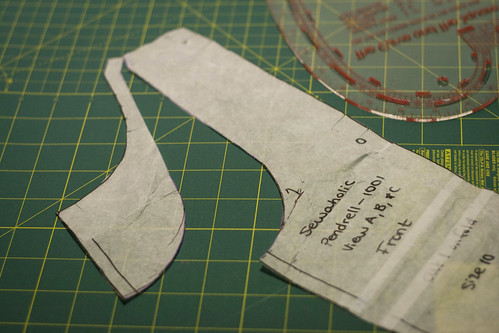
First, I took a quick trip to Dressew and bought a french curve. Best $2.99 I've spent all week! Upon using it, I realized my tape-dispenser method wasn't as bad as I thought, but the curve is still a much cleaner way to go about things.
After taking care of that last change to the pattern piece, I cut out and sewed up my muslin. (Quite poorly, mind you. Please ignore the puckery princess seams and the fact that part of the shoulder seam allowance is on the outside. I'm not going for "wearable muslin" here, so I'm not concerned.)
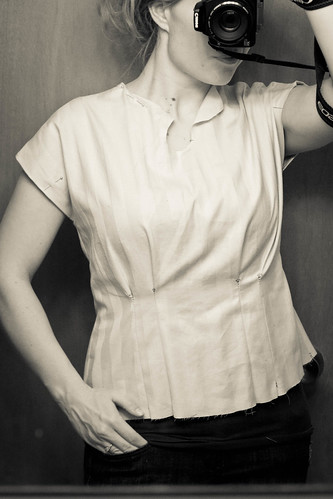
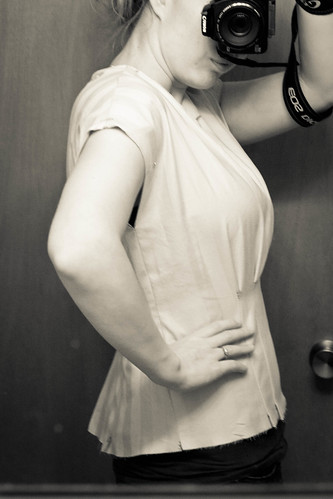
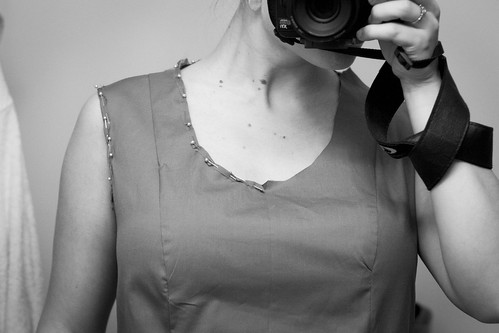
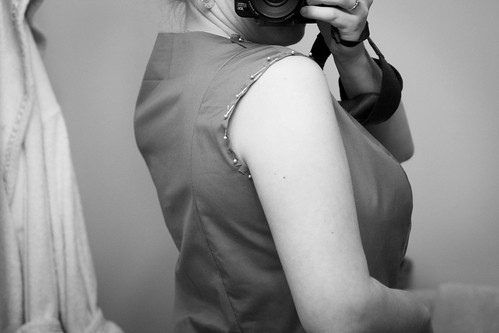
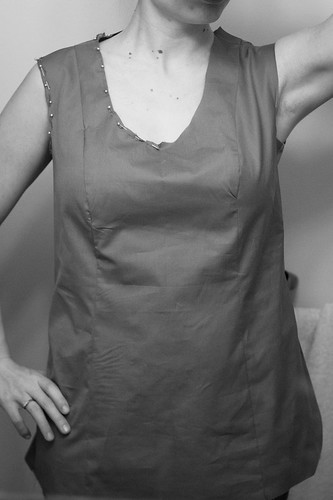
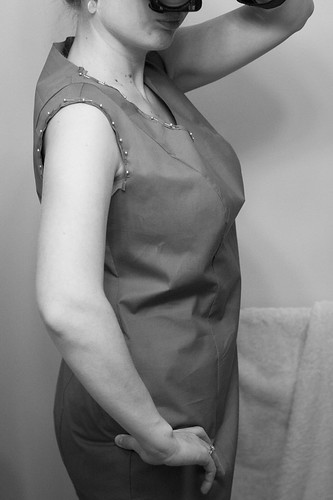
First, let's take a look at what I like. I pinned down the neck and shoulder seam allowances on one side so I could get a better idea of how the finished piece would sit. I love the look of the princess seams down the shoulders, and I'm definitely happy that I opened up the neckline. The width of each strap (is that the right word? Or shoulder?) is perfect, and the full bust adjustment seems to have resulted in good proportions.
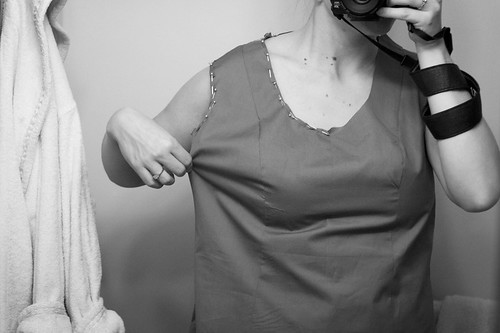
Next, what I don't like. Mainly: the fact that it's way too big!
I know this top needs to have some ease due to the lack of closures. Also, I know it'll hang differently once I make it up in charmeuse. But seriously - while the proportions are right, even the bust is ridiculously large.
To think - when doing the tissue fit, I'd actually been worried it would come out too small! I suppose I can see how experienced sewists bypass the muslin and go directly from tissue to final garment, but I'm so glad I went about things the practical way this time. I couldn't have been more wrong.
To get an idea of how it should fit, I laid out my favourite ready-to-wear silk blouse on top, which is a similar silhouette and also lacks closures. It was almost comical.
There's about two inches of extra fabric on the muslin on each side - about four inches total. Yikes!
So, the next step is to figure out how I want to deal with this. I know that part of the problem is those two added inches from the FBA. But there's at least another two inches to be shaved off as well. I'm not sure if the best move would be to simply remove the inches from centre of the back and front centre peices, or if I should start from scratch and cut a smaller size?
In truth, I think width of the back from armhole to armhole is too wide (I couldn't get a photograph myself, but when standing straight there's vertical creasing by the armholes in the back), and I think the princess seams could stand to move inward a smidge, so I'm going to try the easy route and simply remove the excess from the font and back pieces on the muslin. If that doesn't look right, then I'll consider starting from a smaller size.
On the bright side - I forgot how fast sewing is! After years devoted to knitting, that's refreshing. (Because there's no worse feeling than realizing that you need to rip out an entire hand-knit sweater!)
First, I took a quick trip to Dressew and bought a french curve. Best $2.99 I've spent all week! Upon using it, I realized my tape-dispenser method wasn't as bad as I thought, but the curve is still a much cleaner way to go about things.
After taking care of that last change to the pattern piece, I cut out and sewed up my muslin. (Quite poorly, mind you. Please ignore the puckery princess seams and the fact that part of the shoulder seam allowance is on the outside. I'm not going for "wearable muslin" here, so I'm not concerned.)
First, let's take a look at what I like. I pinned down the neck and shoulder seam allowances on one side so I could get a better idea of how the finished piece would sit. I love the look of the princess seams down the shoulders, and I'm definitely happy that I opened up the neckline. The width of each strap (is that the right word? Or shoulder?) is perfect, and the full bust adjustment seems to have resulted in good proportions.
Next, what I don't like. Mainly: the fact that it's way too big!
I know this top needs to have some ease due to the lack of closures. Also, I know it'll hang differently once I make it up in charmeuse. But seriously - while the proportions are right, even the bust is ridiculously large.
To think - when doing the tissue fit, I'd actually been worried it would come out too small! I suppose I can see how experienced sewists bypass the muslin and go directly from tissue to final garment, but I'm so glad I went about things the practical way this time. I couldn't have been more wrong.
To get an idea of how it should fit, I laid out my favourite ready-to-wear silk blouse on top, which is a similar silhouette and also lacks closures. It was almost comical.
There's about two inches of extra fabric on the muslin on each side - about four inches total. Yikes!
So, the next step is to figure out how I want to deal with this. I know that part of the problem is those two added inches from the FBA. But there's at least another two inches to be shaved off as well. I'm not sure if the best move would be to simply remove the inches from centre of the back and front centre peices, or if I should start from scratch and cut a smaller size?
In truth, I think width of the back from armhole to armhole is too wide (I couldn't get a photograph myself, but when standing straight there's vertical creasing by the armholes in the back), and I think the princess seams could stand to move inward a smidge, so I'm going to try the easy route and simply remove the excess from the font and back pieces on the muslin. If that doesn't look right, then I'll consider starting from a smaller size.
On the bright side - I forgot how fast sewing is! After years devoted to knitting, that's refreshing. (Because there's no worse feeling than realizing that you need to rip out an entire hand-knit sweater!)
Subscribe to:
Posts (Atom)