Pages

Showing posts with label finished. Show all posts

Thursday, September 27, 2012

Renfrew

_MG_2827

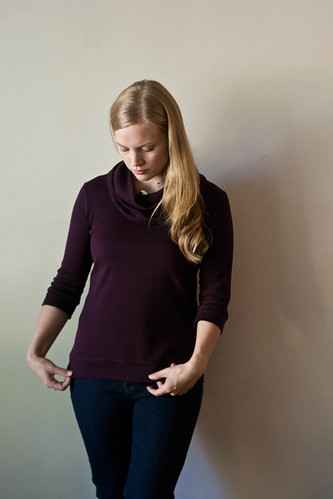
I bought this pattern on impulse last weekend and boy, am I glad I did. Mostly because it really helped draw me out of this funk I've been in, sewing-wise.

I'm not sure if I've ever emphasized this point, but I am not a fast sewist. (Likely exaggerated by the fact that I'm not a patient one, either.) But sewing with knits is a big revelation. This top probably took me about... 6 hours? That includes all the prep work, cutting, fitting, and altering. I feel like, by some people's standards that might be a long time, but for me it's pretty damn fast.

(By the way... "prep work" included a step that I'm not sure was necessary. This fabric is an interlock knit that came in a tube, rather than a flat piece with selvages. When I pulled it out of the bag I realized I had no idea how to work with it. Some impatient googling led me to believe that I had to take the time to cut the whole 2+ meters down a single channel to establish grain... and guys, this is a TINY knit. Is that seriously the only way to establish grain on a tubular knit? Did the internet lead me astray? Anyway, it worked great but took forever.)
_MG_2834

So here's the lowdown:

the fabric is a nice, substantial 50/50 poly/cotton blend interlock knit. You guys know I'm not really interested in using poly, but the choices for non-poly knits at my nearest fabric store were pretty slim. In any case, the fabric actually feels seriously awesome and was a pleasure to work with. That being said, I think the result looks a little more casual than I would like, due to the lack of drape in the fabric... a bit sweatshirt-y, if you will?

When looking at the pattern, my high bust puts me at a 10, my full bust puts me at a 12 and my hips put me at an 8. So I decided to follow the Lladybird method and just grade the pattern. I did a 10 for the shoulders/arms, 12 for the bust, 10 at the waist and 8 at the hips. Easy peasy.

This ultimately proved totally uneccessary. The whole thing came out too big, for one. For two, it must be years of squeezing my boobs into RTW tops, but I actually prefer a super tight fit on the bust in knits, so I think I would have been better just to leave the grading and cut a true size. (well, grading down the hips was probably wise.) The construction of the pattern is awesome, though, in that you sew up the arms and side seams in one step, so it's super easy to take it. I ended up just taking in 1/2" on each arm seam and at the bust, tapering out to nothing at the waist.

I think the fit is now totally wearable, although I still find the shoulders to be too wide and the whole thing still feels a tad loose. Additionally, the bands at the arms and hips (which, yes, I did remember to adjust accordingly) are not tight enough at all. I would prefer if bands of this nature were actually tight against my body with negative ease. Finally, I find the sleeve length isn't quite right for me... I think it needs another inch or so in length, or to be shortened to just above the elbow.

(Just a word about those fit comments... part of why I maintain this blog is to keep notes to refer to in the future. I'm not trying to dwell on the imperfections. And in truth I pick the photos that show the garment to its best advantage when possible, so the things I discuss might not always be visible. You'll just have to trust me :D).

Overall, I think this is the BEST pattern and I can't wait to make more of these. But, I think my preference would be to throw the whole "stable knits" thing out the window and start playing around with jersey, because ultimately I think this garment would suit me with a lot more drape to it. (Viscose knits, I'm looking at you.)

Be prepared for a whole host of thoughts on the idea of sewing cake... I'm sold.

Thursday, February 23, 2012

Beignet

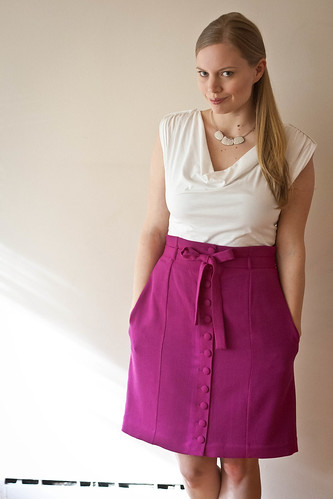
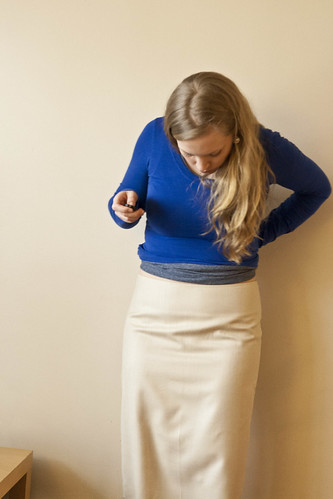
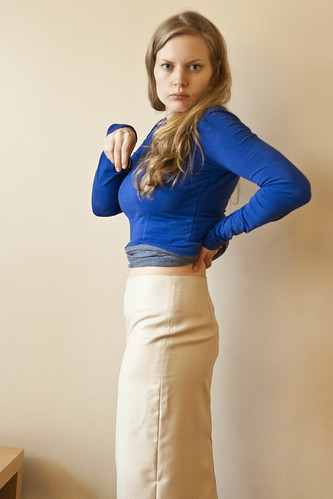
After languishing 99% finished in the cupboard for a few weeks, my Beignet skirt is finally finished.

_MG_2658


I'm absolutely in love with this skirt. It's by far the best and most comfortable, wearable thing I've ever made.

The fabric is a wool crepe I picked up on clearance in the summer. Locals might recognize it - there were still bolts of it available at the Boxing Day sale! Either they had stocked way too much of it, or I'm just the only person in Vancouver who actually wanted to buy bright fuchsia wool. In any case, it was the best of all worlds because it was a fabric I actually wanted to work with at a price that let me justify approaching this as a "wearable muslin."

I'm very glad I approached it that way, because this project felt so much more straightforward and fun. I fall between a size 8 and 10, but closer to the 10, so I followed Colette's advice and cut that size. In the end, it was too large and I had to take in two inches all over (I simply took in the side seams). Otherwise, the fit is perfect. The proportions are correct and I absolutely love the straight silhouette - not pencil, not a-line. I love it so much, I plan to turn it into a TNT pattern with a solid front and a side zip. I also want to make another true-to-pattern version in a more neutral colour.

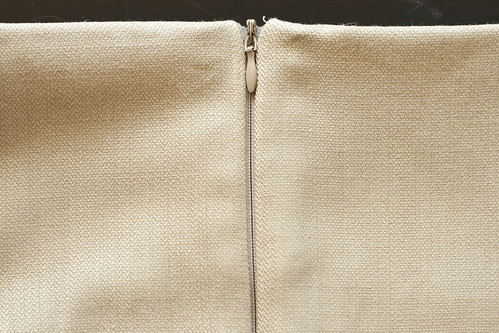
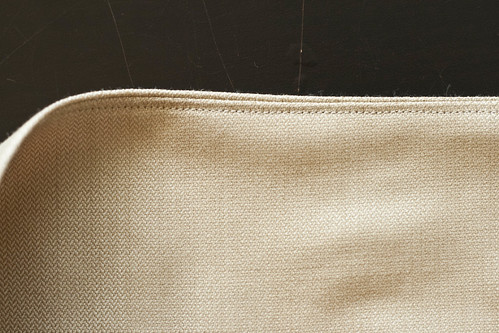
I lined it with bemberg rayon and actually really enjoyed working with it - perhaps I'd just heard too many horror stories so my expectations were low. The only real mistake I made was picking too dark a colour. In person you can see where the lining meets the facing although, happily, the belt distracts enough that it's not really an issue. I had already hemmed this once, before realizing it definitely needed taking in, and I did the machine "invisible" hem. It was a little too visible, so this time I did it by hand. I chose to omit the twill tape in the waist, which I may regret, but I didn't have it on hand and wasn't willing to make another trip!

_MG_2659


My next project is a dress (Lonsdale), and I'm trying to decide how to approach it. After this experience, I'm really keen to continue forgoing the muslin altogether. It really does drain a lot of the fun out of sewing for me. I suppose ultimately it depends on the complexity of the pattern and the cost of materials. Since the Lonsdale is relatively simple and the fabric was on sale, I think I'm going to go straight to fashion fabric. Wish me luck!

Wednesday, February 8, 2012

Lotus

My first knitting project of 2012:

_MG_2579


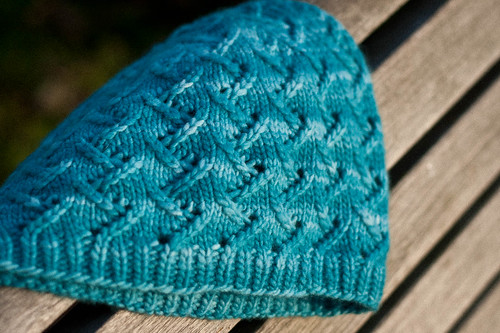
It's the Lotus Hat (pattern is free and available here) made up in Malabrigo Merino Worsted. The pattern was a breeze to make, very fun and straightforward. I cast on Saturday and bound off Monday, with no marathon knitting required. The charts were easy to memorize - in fact, it was so easy to "read" the knitting as I worked it that I'm not sure memorizing the charts was even necessary. I love the end result.

_MG_2584


My only word of warning: this pattern comes out small. I obtained gauge and followed the instructions for the "long" version (four repeats of chart A, rather than three) and it still came out so short that it popped off my head prior to wet blocking. Now, that being said, I do have a rather large head. Still, it barely covered the tips of my ears, let alone my earlobes (as it said it would)! Luckily, this was made as a gift for my mother in law, who is rather birdlike in stature. Also luckily, I didn't bother to wash and block my gauge swatch, so it had some room to grow. Hopefully it fits her correctly!

In sewing news: my Beignet skirt has been finished for forever, save for the hem (which I just haven't had time to sit down and take care of). It's hard not to use pressure to update this blog as an excuse to craft, but I really do have other things on my plate at the moment. Hopefully you'll be seeing it sometime this week!

Sunday, November 27, 2011

Skew

_MG_2310


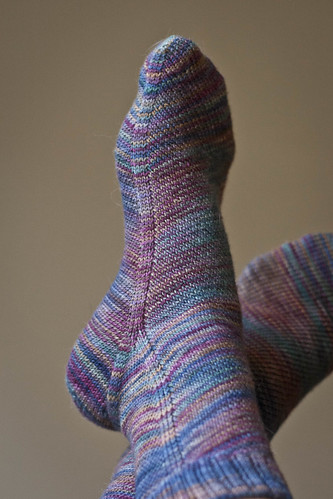
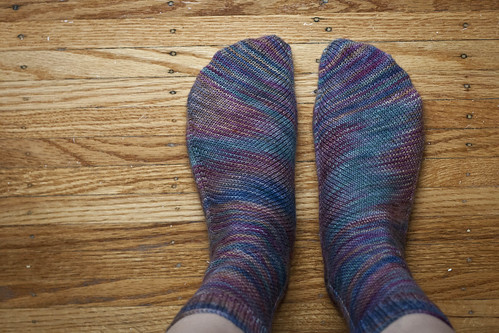
I started working on these socks back in April, but eventually put them away because I encountered a problem that I couldn't figure out how to fix. Actually, it would be more accurate to say that I didn't know what the problem was. Often, I find putting away projects is exactly the thing you should do. Usually, by the time I pull them out again I've either given myself enough distance to gain perspective, or enough time to gain patience, or enough projects in between to gain the skills necessary to fix the problem.

In this case, what I ended up giving myself was anxiety, because I couldn't figure out where I'd put them! Thankfully, after a few weeks of looking I found them tucked safely away in a bag of sewing notions. Silly me. Anyway, upon bringing them out again I was able to see that I'd failed to wrap my short rows. Now, maybe one should just know that this is always a step in creating short rows, but I still don't really understand why they simply write "turn" instead of "wrap and turn." Would those few extra words be so hard to include? Anyway, I digress.

_MG_2338


I managed to fix the problem by changing the setup row for the cuff, replacing all the Rlinc and Llinc increases with M1s. By doing this, I pulled up the strand below the hole and twisted it, filling in all the holes. It looks fine! The hardest thing was then going on to make the same mistake on purpose on the matching sock.

Ultimately? This pattern was so great! It's precise, mathematical, and knits up exceptionally fast. The "origami moment," as they call it, where you put together the heel is pretty satisfying. And the ergonomic toe fits SO comfortably. I really want to pick up two different, solid skeins of Koigu and knit a striped version. (Check out the most popular finished objects from this pattern in Ravelry... most of them are striped and they are beautiful!)

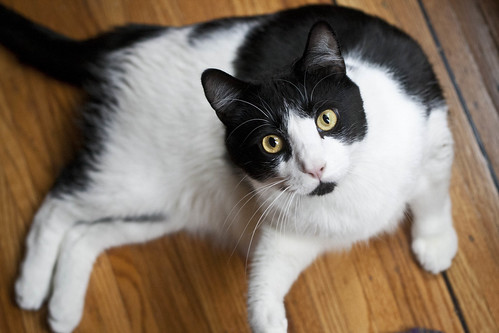
On another note, thanks for all your sympathy and suggestions on yesterday's post. I hope it was clear that it was a moment of frustration - really, they're lovely cats and there are some days where they are the thing that gets me through. I feel as if I should write a post telling you all about what makes them wonderful, to counter-balance the complaining about the naughty behaviour. But that would make me an extra crazy cat lady, wouldn't it?

_MG_2341
Please, don't hate me.

Monday, November 7, 2011

Baby Knits

Recently, I spent a good chunk of my knitting time on a few projects which I couldn't talk about online, as they were intended as a gift for another web-savvy knitter. Well, two weeks ago that dear friend gave birth to a beautiful bouncing baby boy, and today I got to meet him and give him his presents!

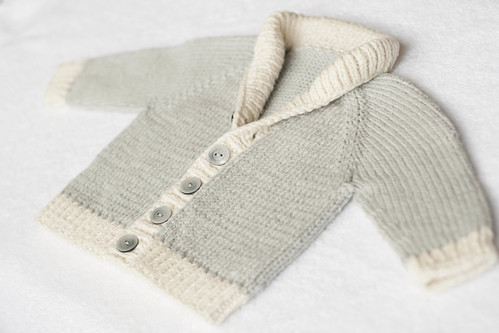
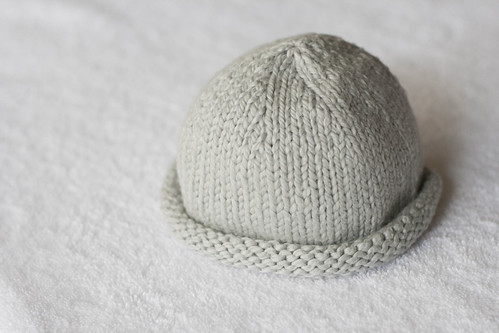
First, a wee cardigan and a hat to match:

_MG_2179
_MG_2200


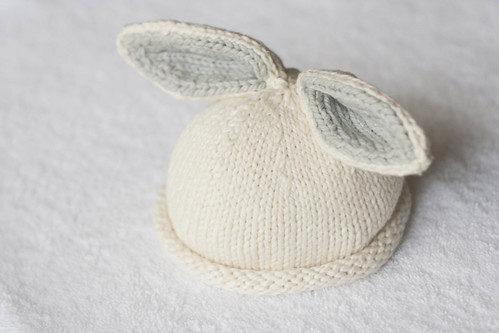
Second, an itty bitty bunny hat:

_MG_2209


The bunny hat was at the suggestion of my husband. He spent the winter of his first year dressed up in a fleece snowsuit with bunny ears, and the photos are pretty priceless. We included a few of them in our wedding slideshow this summer, much to everyone's amusement. So, a bunny hat it was! I used the Bunny Beanie pattern, available for free here on Baby Center. This was a great little pattern and I highly recommend it. (Although it is a little light on the directions when it comes to attaching the ears, but after a little advice from my friend SnappyStitches, it all came together perfectly.)

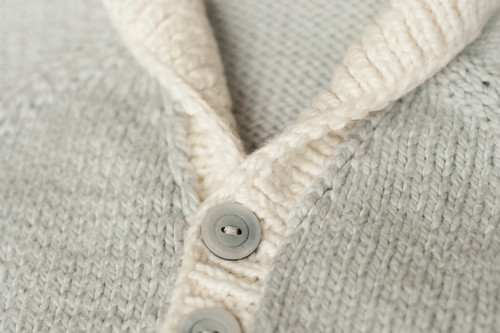
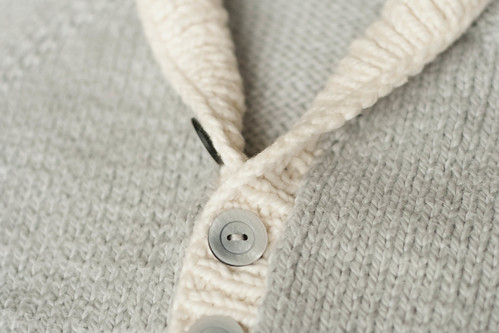
The cardigan was made from the recently published Gramps pattern. It was love at first sight. This pattern is so cute and the copy made me laugh out loud. ("We think it’s hilarious how babies sometimes look like old geezers - so we created this shawl-collared grandpa sweater for your grouchy little old man!") I made the 0-6 month size, which by measurements is definitely more appropriate for a 6 month old baby of average size (otherwise, I pity the woman who bears a newborn who could fit it!). The pattern is well-written and I especially enjoyed seeing the shawl collar come together. (I used this tutorial by Cat Bordi for concealing the short row wraps and it was incredibly helpful!)

My only criticism of the pattern is to do with the button band/collar. They instruct you to pick up stitches starting at the bottom hem, working as you usually would (i.e. picking up from the outside/RS so the seamline ends up inside the garment). However, when you reach the part of the neckline where the collar begins, they instruct you to switch so that you're picking on from the wrong side (and thus the seamline will now be on the outside). I understand the reasoning - in theory, the shawl collar will fold over, concealing the (now) outer seamline, and will be more likely to reveal the seam from the inside. However, in practice, there's no way it's ever going to fold over that far. This is compounded by the fact that the uppermost buttonhole is right at the bottom of the collar - thus preventing it from folding over to conceal the seamline. Hopefully these photos illustrate my point (it's more obvious on the left side than the right). The first photo is with the top button done up, the second is with it undone.

_MG_2191

_MG_2192


Anyway, it's not the end of the world. It still looks pretty tidy and I imagine she can just leave the top button undone. If I ever knit this again I'll just leave the seamline on the inside the whole way around. I had to omit the cute elbow-patch and pocket details as I ran out of contrasting yarn, but I'd love to make another version of this sweater one day with all those little details included! I still think it's a completely charming pattern and highly recommend it.
Tuesday, November 1, 2011

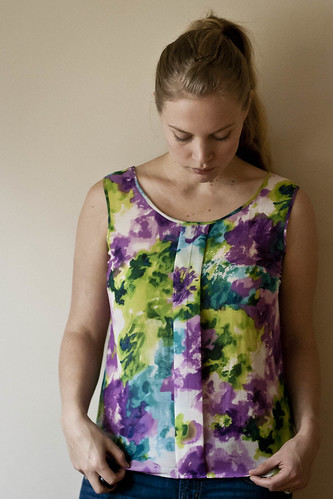
Sorbetto Redux

_MG_2145


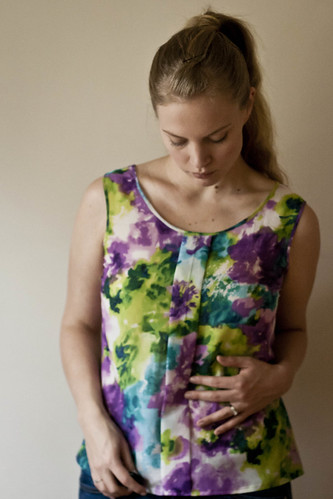
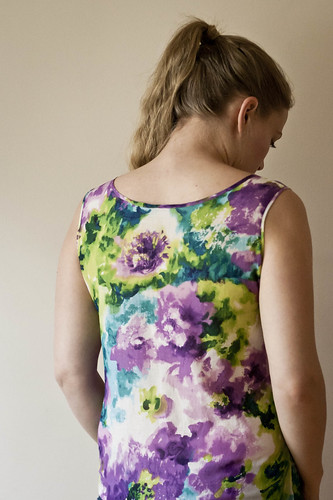
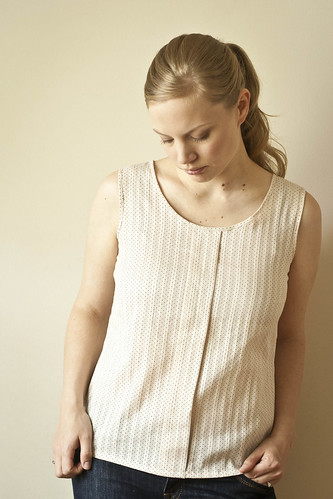
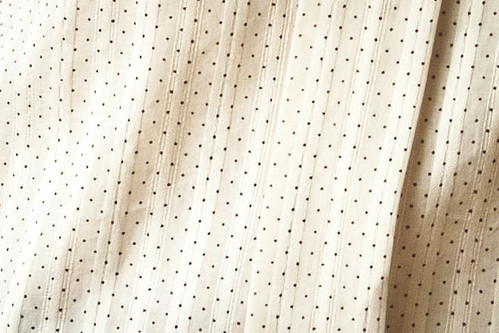
As my silence may have hinted, I've been in a bit of a sewing funk. Everything just started to feel like it was taking too long and not fitting correctly. Add in some shifting of life's priorities (i.e. amping up the job search, among other things) and I just let it take the back burner for a while. But I wanted to get myself out of the rut so I decided to take this pretty cotton/silk voile out of the cupboard and whip it into a quick Sorbetto.

_MG_2113


Well, "quick" isn't really the right word. In truth, this thing took forever. Yet again, I struggled with moderation, made a ton of mistakes (sewing bindings on inside-out, etc), and ended up feeling like my whole day got sucked into sewing. (Because it did. 9:30am I was printing the pattern pieces, 10:30pm I was pressing the hem. Although, in fairness, there was some eating in there somewhere.)

_MG_2142


But, ultimately there was success. First, it fits! Second, it fit with much less annoyance than the last time. I still fall between sizes. However, rather than making the larger size (like last time, as recommended by Colette) and then having to add a pleat in the back, I simply made the smaller size (size 8) and... that was it. Ta-da! It fits. I still had to lower/shorten the dart, add some length, and take an inch off the hips... but otherwise, it's pretty darn good.

(Actually, I ended up having to remove even more length from the dart this time... almost 2". Is that a large bust thing? I can't imagine that length of dart being appropriate on anybody... but then again, I guess I really only know my own body.)

_MG_2134
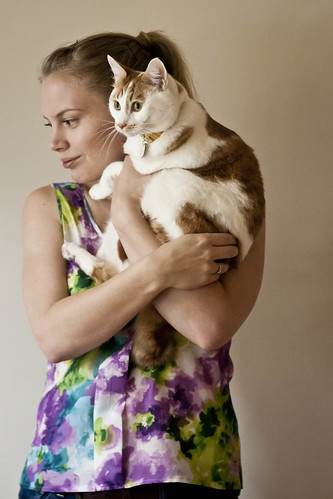
These guys always get very curious about my photoshoots...


In a perfect world, I would figure out how to do a small FBA on this, as it it doesn't have much ease in the bust. I would also probably lower the neckline a little... as someone who generally wears either scandelously low necklines or crewnecks/boatnecks, this feels a bit in-between. However, I may just get used to it. Time will tell! Lest I sound negative, I actually think this might be the first truly wearable item I've sewn (pajama pants aside).

I've put myself on a rather strict unemployment budget so if I remain inspired to sew then it's time to get going on my Lonsdale and Bombshell... because they're the only projects I have the fabric for! Unless I cop out and finally make that apron I've been planning, but I can't find a pattern I like and I'm not feeling up to the task of drafting. (Which I realize is totally ridiculous, considering the simplicity of the project. I just want one project that's a straightforward cut-and-sew, you know?)

However, there will be knitting updates soon. The two secret projects will be gifted soon (and therefore no longer secret) and a pair of long-hibernating socks is now nearing the finish line. It seems the more sewing I do, the more it affirms my love of knitting. Comfort zones, I suppose.

Thursday, July 28, 2011

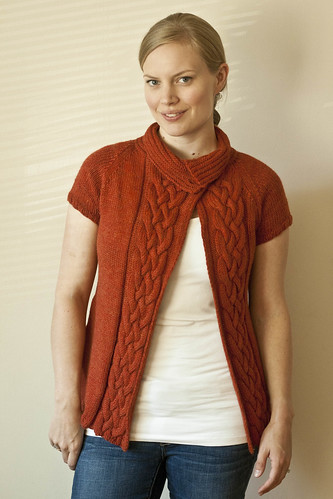
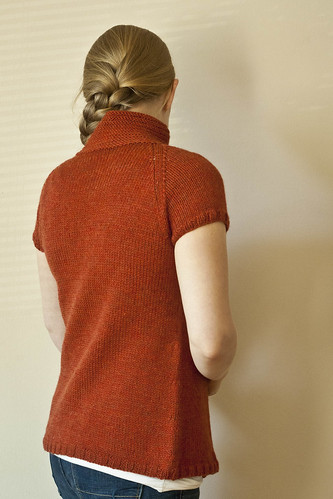
Three Year Cardi

a.k.a. the Asymmetrical Cabled Cardi

_MG_1758
Finally finished!


I cast on for this sweater on my birthday, November 24th, 2008. It's a bottom-up design, and it went swimmingly until I reached the raglan decreases. At that point, it became apparent that the pattern has some problems (as further evidenced by the number of project notes on Ravelry which contain complaints about said problems). In the end, I knit this sweater from the armpits up FOUR times over three years. (And the collar one extra time for good measure.)

In summary: I'm so excited to finally be able to wear this freaking thing!

_MG_1843


I can't seem to write a concise post about the errors/mods to save my life, so I'll just add those to the Ravelry page instead. Basically, i did it in regular stockinette (rather than reverse), added some width to the left front for coverage and both front edges for smoothness, added both some length and width to the sleeves, and figured out my own method for completing the raglan decreases.

I also went down two needle sizes for the collar after reading that some people had trouble getting theirs to stand up, although in retrospect that may have been overkill as it sucks in toward the neck a little too much and I prefer the way it looks folded down anyway (as above). I also ended up moving the buttons over, resulting in a much slimmer neck, in order to get a little more overlap/coverage on the front pieces.

_MG_1830


The funny thing is, I usually get discouraged when having to rip back a project, but I did it so many times with this one that I kind of became immune to it. I'd happily knit away and then discover a problem and just think, "here we go again!" and rip it back. On the bright side, I'm now pretty awesome at picking up rows and figuring out where I am in a cable pattern. (Admittedly, my crazy love for the design and the colour of the yarn kept me going.)

After all that work, I only hope my assistants don't get their claws on it! (I did have to resort to blocking it on the balcony. These guys do love wool!)

_MG_1807


The Details:
Pattern: Asymmetrical Cabled Cardi by Yahaira Ferreira
Needles: US9(5.5mm) (and US7(4.5mm) for the collar only)
Yarn: Cascade 220 in colourway 2425
Size: 39
Guage: 4.5spi (the pattern indicated 4spi, so this fits small)
Cast on: November 24, 2008
Bound off: July 24, 2011
Total # of stitches: 31,740 (give or take for fit adjustments)

Wednesday, July 20, 2011

Sorbetto Love

_MG_1689


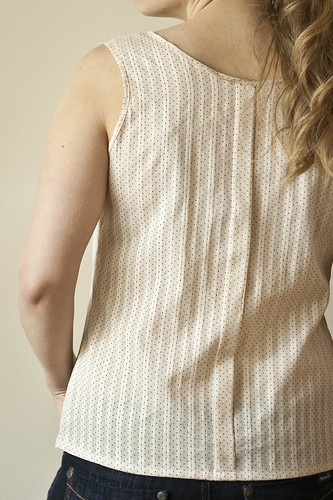
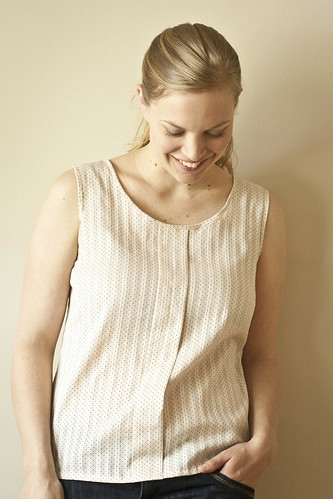
Yesterday I decided to make this light and summery top, and I went full-steam ahead without a muslin. It's not perfect (as usual!), but I think the beauty of a simple, loose fit like this is that it doesn't have to be perfect. In fact, regardless of the fit dissection I'm about to delve into below, this might be the first piece I've made that could actually make it into regular wearing rotation. (Well, besides the pajamas.)

The fabric is some light-ish weight semi-sheer cotton I picked up at the Fabricana Canada Day sale. (Not sure what kind... heavier than voile, lighter than broadcloth/quilting cotton?) In addition to the fit changes, I added 1.5" to the length of the top and I'm quite glad I did. (I could see that this would be unnecessary if you were the type of person who enjoyed tucking things into high waists. I am not that person, however.)

_MG_1689-3


Based on the measurements I cut the size 10, following Colette's advice to use the larger size if you fall between sizes. This didn't work out as well as it should have. The front was almost exactly the right size, but the back was huge and billowy and just way too large. Rather than pick out any seams, I decided to simply mimic the front by creating a 1" box pleat on the back piece. This ate up 2" of fabric and I'm now very happy with the fit through the body.

_MG_1735


The only problem with this quick-fix pleat was that it messed up the fit of the shoulders. In the front, the shoulder straps sit a smidge too wide. In the back, after the pleat was put in, they sit a smidge too narrow. Neither of these problems is really noticeable on their own, but it means that when the straps attach at the shoulders they kind of want to tug each other in the wrong direction. As a result, the straps in the back look a bit like they're pulling (although they're not too tight) and the neckline in the front gapes a bit (from the straps being pulled in). (This isn't really visible in the photos.)

I think the solution on future versions would be simply to cut a smaller size and do an FBA. But ugh - between the loose fit and the fact that Colette cuts for a larger cup size, it seems silly. But I suppose using patterns drafted for a C-cup still isn't a perfect solution when one is an F-cup...

Regarding the bust, the only alteration I had to make was shortening and lowering the bust dart. I shortened it by 1" and lowered it by 0.5" and I think it's just about perfect. I've never made a darted front before, and after all my previous experiences messing around with princess seams and gathers, it seemed almost ridiculously simple. Love darts!

_MG_1694


I'm definitely going to make new versions of this top and try to perfect the fit, because it's such a great base for embellishment. I'd love to have a whole collection of them around for summertime.

Friday, June 24, 2011

Big Brother Pajamas

I adore pajamas. They were the first real thing I learned to sew, and I've been sewing them ever since. I especially love to make them as gifts. This pair was for my big brother, who turned the big three-oh this week! (Mr. Modiste kindly modeled them so they could make an appearance on the blog.)

_MG_1427
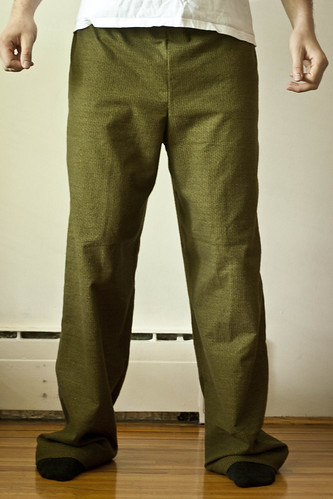
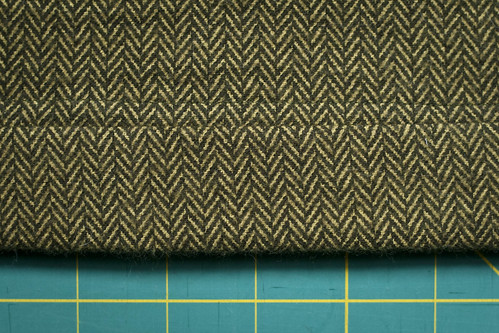
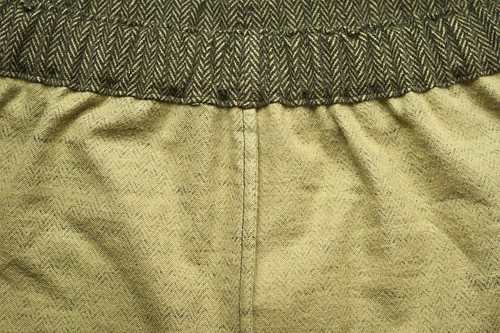
(These look like plain green, but they're actually a fun herringbone print.)


When I make PJs for men I always use McCalls 2586, which is a seriously wide-leg pattern. This photo illustrates that point a little better:

_MG_1426


My brother is quite tall. 6'4", I believe. While in the midst of making these I started to worry they were going to be too short, so I added a bit of extra length by cutting separate pieces for the cuffs. In the end, this may have been overkill, as you'll notice how long they are here on Mr. Modiste. (He's 6'3".) But, who cares? They're pajamas! (This is my favourite phrase when sewing pajamas... and probably one of the reasons I love sewing them so much!) Besides, isn't it a bit of a fun novelty for people who are 6'4" to have a pair of pants that are too long? Well, I hope so!

Now for a few details! First, the afterthought cuff:

_MG_1431
_MG_1442


I actually sort of like the way this looks, with the double-row of stitching.

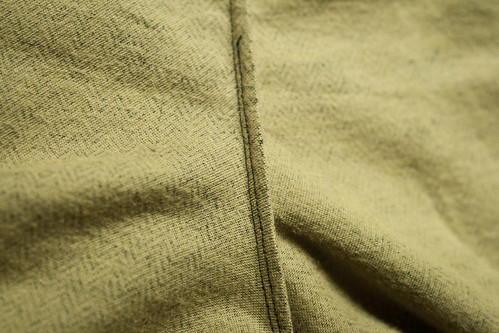
French seams again:

_MG_1433
_MG_1438


This time I did a proper french seam for the crotch seam, rather than the faux french seam like last time. It worked out great. I did reinforce it, as the pattern suggested, which turned out nice and clean looking.

I really do love making these as gifts. They're easy to fit without having to tell the recipient what you're making, it's fun to pick out flannel prints for each person you make them for, and they're quick and forgiving to sew (not to mention comfy for the recipient to wear!) Homemade gifts were especially valued in my house growing up, so I try to make sure to make my Dad and brother at least one big gift a year. (Much to the confusion of a helpful Fabricland employee who once tried to whisper to me that it was cheaper to just go and buy a pair at Wal-Mart, lol.)

Hopefully my brother likes them!

Tuesday, June 21, 2011

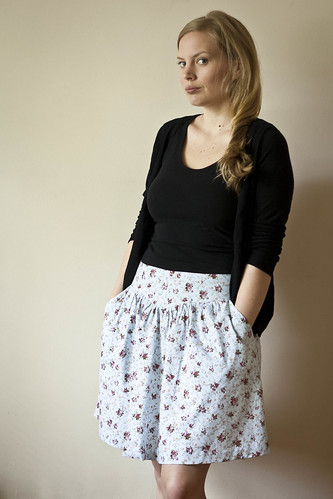
Crescent Skirt - Finished!

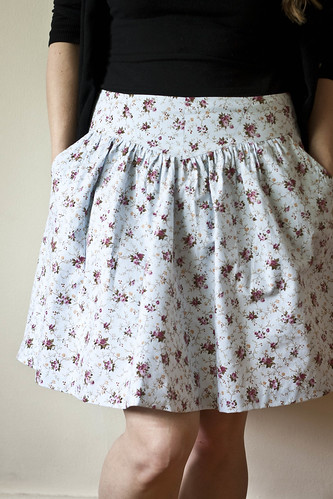
I'm so excited to finally show off my Crescent skirt!

_MG_1329


This was meant to be View C... but when I laid out my fabric to cut it out, I realized that it was only 42" wide instead of 44", which was too narrow! What's up with that? Is that a quilting cotton thing? Anyway, I improvised by cutting View B, but extending the hem all the way down to the size 16 length. It worked well enough, and I'm actually super happy with it - I think any longer would have been too long on me.

As I mentioned in previous posts, the modifications I made were to cut 1" off the top of the waistband, and to grade the waistband pieces from an 8 at the hip to a 10 at the waist. My hope was that these two modifications would bring the skirt down to a more tolerable place for me to wear it, seeing as I find things sitting on my natural waist completely uncomfortable. (I am seriously a child of the low-rise generation!) I failed, however, to consider the fact that my muslin was not interfaced and had no twill tape... so this didn't work out quite as well as I'd expected. It's still a tad high for my comfort, but I figure it'll be a good piece to help me try to get used to things sitting higher. We'll see how that goes!

A few detail shots...

_MG_1399

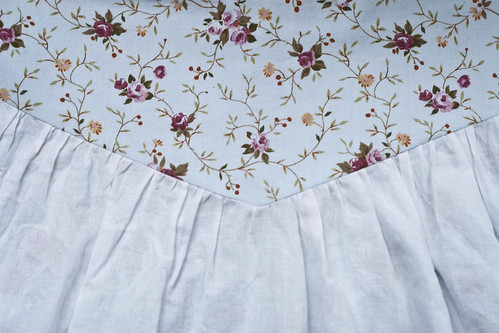
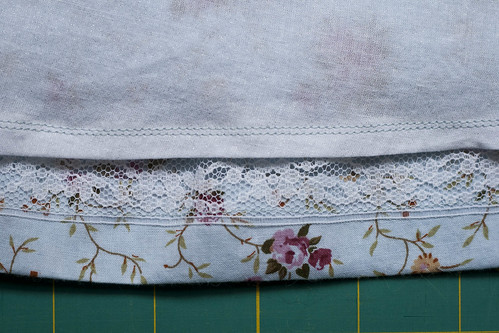
I lined this with a white/silver voile. You can't really see it, but it has a silver sheen when the light hits it. It's actually quite pretty, honest!

_MG_1404

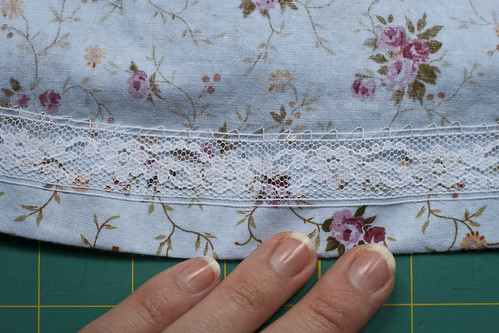
The lace hem facing worked out great and really spoke to my inner perfectionist... it's so easy to make evenly spaced hand stitches when you have a patterned lace to follow! In retrospect this would have looked fine machine-stitched and that would have saved me a lot of time. Oh well... I do love hand-stitching :)

_MG_1403

That double line of stitching on the lining hem was just because I didn't get close enough to the edge the first time around. Oops!

_MG_1410

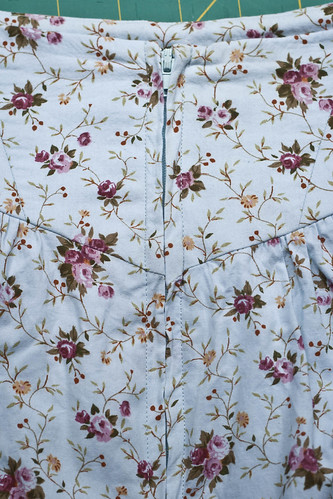
This method of zipper insertion was positively magical... thanks, Tasia! (Mine doesn't line up perfectly but I couldn't care less!)

Time will tell if this skirt sees a lot of wear, between the fabric (not my usual style) and the fit. Regardless, I still love it and I'm already plotting my next version. (View A, which I think will be a little more wearable for me.) I'm just trying to debate the best way to tackle the fit issue. I'm torn between fussing with the grading (maybe from an 8 at the hips to a 12 at the waist? Would that be crazy?) or maybe just omitting the twill tape at the waistline and seeing if that allows a little more stretch? Hmm... let me know if you have any suggestions!

_MG_1353


_MG_1378


(Also: every skirt should have pockets, don't you think? So great!)

Thursday, June 9, 2011

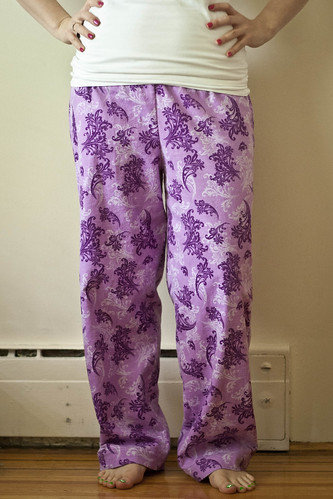
Mojo Pajamas

Wow, where to begin? It's been a while, that's for sure. To make a long story short, about a month ago I was laid off from my job. Don't feel bad for me - this was a very good thing. So now I'm happily unemployed for a spell, and keeping busy by traveling and planning my wedding. However, I haven't really been crafting. I'm not sure why... and so, a few days ago I decided I needed a mojo project. Something fun and simple and hard to screw up. Pajamas!

_MG_1197


The pattern is Butterick 6474, which I bought about seven years ago. In fact, I bought it to take a sewing class through the school board so I could learn to read patterns! (Until that time I was more of a wing-it, self-draft-it kind of girl. But then again, I mostly made hair ties and aprons and whatnot in my youth.) It's not specifically a pajama pattern, but it does the job fine.

The only thing I'd say about it, which someone on Pattern Review also mentioned, is that the crotch curve is all out of whack. For my preference, it's too long in the front and too short in the back. (In fact, they're practically the same length.) Additionally, the rise is crazy high, which I didn't realize until after I'd already finished the waist. Oops. So, after unpicking, rather than monkeying with the depth of the curve, I simply lowered the waist further in the front than the back. (I took it down 2" in the back and 3" in the front.) Although I wish the curve was deeper, it worked out fine this way.

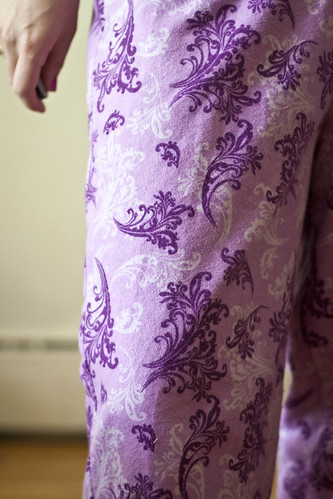
The fabric is some beautiful damask-y flannel I bought at Fabricland back in December. I love it.

_MG_1200


To keep it interesting, I decided to use this project as an excuse to try out french seaming. And all I can say is: I'm in love. Such a clean finish, without having to drag out the serger? Yes, please. I think I did a bit of a sloppy job, and didn't really account for the cloth allowance... but hey, they're pajamas.

_MG_1249


When I went to do the crotch seam, it seemed a shame to serge, so I just did a little clipping and created a faux french seam as an afterthought. Despite the strong curve it worked out fine. I love flannel, it's so forgiving.

_MG_1252


When I make pajamas I always do a line of stitching at the fold of the hem and the waistband. I find it just looks so much cleaner this way.

_MG_1255


_MG_1244


The hem, however, marked the first time this year I've been annoyed by my machine's lack of a free arm. If I ever change machines in the future, I think I'd like to have this option.

Anyway, it's nice to complete a project in less than 4 hours, without a muslin, and happy with the end result. I have a whole bunch of sewing on the horizon and I'm hoping my mojo sticks around long enough (and I stay in one place long enough!) to get some things accomplished this month!

Also: flannel is a cat-magnet. At least in this house it is.

_MG_1243

Tuesday, April 26, 2011

Cassis

I'm so in love with this sweater.

_MG_1058


The Details:
Pattern: Cassis by Thea Coleman
Needles: US7(4.5mm) 32" Knitpicks Harmony interchangables (and US8 for the cast-on only)
Yarn: Berroco Ultra Alpaca in Oceanic Mix
Size: 36
Gauge: 5.5sts/inch (slightly off pattern)
Cast on: March 14, 2011
Bound off: April 23, 2011
Total # of stitches: 55,918 (give or take for adjustments to the sleeves and length)

_MG_1067


After reaching my limit on fiddling with fit with all my sewing projects, I'm glad I picked a knit project that didn't ask a lot in that department. I chose the 36" size going by my high bust measurement, knowing that this sweater doesn't have to close. My gauge was slightly off at 5.5spi, but I figured that there was a fair amount of design ease and that the Ultra Apaca would be fairly forgiving. (Both were true!)

The only real modification I made was to the sleeves. I found them too wide, so I did the decreases on every 4th row instead of every 5th, and did a few extra decrease rows. (I don't have my notes with me, but this wasn't a very scientific process.) I suspect the shoulders are a little too roomy, and a bit long from shoulder to armpit, but it's a loose and comfy sweater and so it doesn't really matter one way or the other! I also added about eight rows to the length of the body.

After blocking, I noticed I made one tiny mistake. One purl stitch in a sea of stockinette. I know that nobody can see it, and so I'm trying to resist the crazy urge to unpick the bind-off and drop the stitch back about 100 rows to fix it. (It's near the lace panel on the centre front.) But honestly, I love the sweater enough to overlook the imperfection!

_MG_1080


Special shout-out to my assistant, who managed to not eat this knit-in-progress despite my leaving it unattended on more than one occasion and blocking it in plain sight on the kitchen table. Well done, little friend. Well done.

Wednesday, April 20, 2011

The Naked Pencil Skirt - (Mostly) Finished

Lest you think I haven't been up to anything, I thought I'd share the (mostly) finished pencil skirt. I still haven't hemmed it... and now, you'll see why! (Beware: the lack of pressing may reveal my general apathy toward this garment!)

You see, it had potential:

_MG_0952


However, the slightest movement caused this to happen:

_MG_0957


Basically, it seems the "problem" here is that the area around the level of my hip sockets is shallower than my stomach and my thighs. As you can see, this "problem" extends all the way around to the back:

_MG_0961


(I say "problem" with quotation marks because the real problem, of course, is not my body, but rather my inexperience with fitting/sewing!)

You might remember that I originally posted that it was too small. Well, that was actually mostly the result of my attempt to fix this wrinkling issue. I tried taking in the extra fabric at the side seams, but mainly it just made the skirt too tight without properly resolving the issue. However, after letting that back out, the thighs are still a tad snug at the top.

Anyway, so it's not exactly a winner. That makes me a little sad, because I really did love this fabric. But then again, as I said in my previous post, I'm kind of proud of all the little details I learned while making this skirt. For example...

Invisible zip (not perfect, but not bad!):

_MG_0967

(I mostly followed the Cupcake Goddess's tutorial for this, but I omitted the stabilizer. However, her suggestion to press the seam allowance over was exactly what all the other tutorials were missing. Genius.)

Understitching:

_MG_0981

(Tasia's tutorial was extremely helpful.)

Adding a lining/facing:

_MG_0982

(I used this tutorial from Threads for adding the facing/lining as I did, although if I were to do this skirt again I would omit the facing and just understitch the lining so it didn't show. The facing definitely shows through the front of the skirt in this fabric. Also, I couldn't find a single tutorial that mentioned how the heck to sew the facing/lining down on the inside next to the invisible zip... so I made up my own way, and it worked!)

Adding a back vent:

_MG_0971

(I used this tutorial, and this tutorial, both from the Cupcake Goddess.)

And that's that. My little skills-sampler of an ill-fitting skirt. Perhaps one day I'll try tackling the pencil skirt again, but for now I think I'm going to say goodbye to pencil skirts and silk charmeuse and focus on simpler and more gratifying beginner projects. I think "go big or go home" was a good attitude to jump in with, but at this point I'm dying for a finished garment that I'm enthusiastic about!

With that in mind, I'm going to start the Crescent Skirt sew-along. It won't be boring, but it's an easier fabric and a more forgiving style, don't you think?

(Also, for those of you who saw my deleted post about wedding dress size selection, which I'm told was cached in some people's RSS readers after I deleted it: I figured it out. I decided to stop the cycle of anxiety and just go straight to my trusted neighbour/surrogate mom/seamstress and ask her expert opinion. She recommended the smaller size. Done and done!)