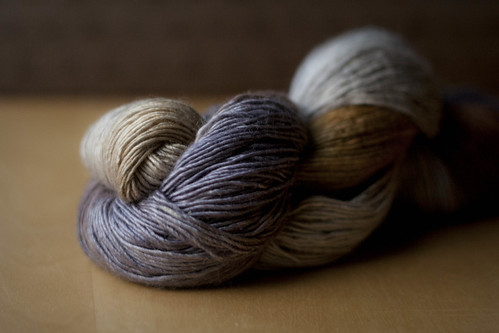
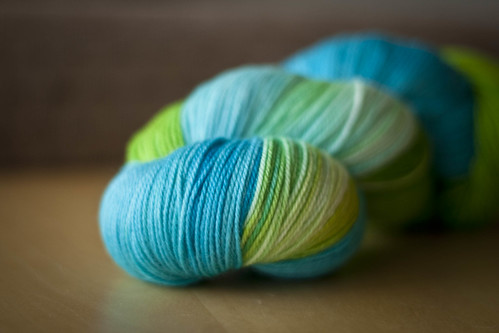
Remember a few posts back when I mentioned that Mr. Modiste had a big job interview?
Well, he got the job! Hooray!
However, what this means for us is that he'll be away for five weeks of training in Toronto, starting in about a week. And, further, he'll be working out of Toronto going forward - commuting home on his days off. (He works in aviation - so this commute isn't quite as ridiculous as it sounds.)
It's a bit bittersweet for us... an amazing opportunity but a lot of time apart. What it means for this blog, though, is that I'll have a whole lot more free crafting time in the coming months. Silver lining, right?
Wednesday, February 16, 2011
Sunday, February 13, 2011
Time to Regroup
Well, this blouse has almost defeated me.
I was determined to sew it up this weekend, but got sidetracked by serger difficulties. I really wanted serged seam finishes in this blouse - but that just isn't happening. After battling with the serger tension for about half an hour yesterday, I determined that A) this thing is probably overdue for a servicing and B) my needles are decidedly dull. Serger needles were something that hadn't crossed my mind at all. Blonde moment #2!
So, in the meantime I started with the sewing, putting together the pieces that don't require finishing first. This morning I happened to be driving past a sewing store, so I swung in. They only sold three types of serger needles (short, long, and ball-point) so I decided to take the leap (as I didn't have my needles with me) and guess. I picked the right length but of course the shape of the shank is wrong - meaning that store doesn't carry the right needles at all. The place where I bought the last set is closed Sundays. I don't have a car to go further.
A more rational person might haven chosen to stop here. But I thought - am I being too prissy about these seam finishes? Should I try another method? So I decided to try my old "fake serging" method - a row of straight stitching next to a row of zig-zag. Well, this is where it all fell apart. The zig-zag stitch sucked up the slippery charmeuse and created a pleat beneath the stitching - aside from not being pretty, there's a fair amount of added bulk.
If I'd stopped at the shoulders it would have been no big deal, but unfortunately I tried the back seam. It looks fine from the outside but... I'm picky about these things. So, once again, the blouse is going back in the project bag while I decide what to do.
This blog may be a bit knitting-focused for the next few weeks while I regroup from the frustration, lol.
Friday, February 11, 2011
Success, Blonde Moments, & Rookie Mistakes
Success: I found my fabric. Yay!
Blonde Moment: After some final muslin tweaking (and un-tweaking), I went ahead and cut out my fabric. Except, I somehow ended up following the layout instructions for a 45" instead of 60" fabric. (I think you guys all know what this means, but basically I didn't end up with enough length to cut both the front and back pieces on the fold.) Oops!
Rookie Mistake: Yes, as you might gather, I neglected to lay out ALL my pattern pieces before I started cutting. I blame my enthusiasm for trying out my rotary cutter and pattern weights, rather than messing around with pinning the slippery charmeuse. (And, my table isn't long enough to lay out 2 meters of fabric.) Ah well, sometimes we have to learn these lessons the hard way.
However...
Bright Side: I still had enough fabric! Win! And, I was smart enough (or, you know, had the dumb luck) to cut the front piece on the fold before the back - meaning that the back will have an extra seam, but the front is unaltered by this mistake. (Yes, I remembered to add a seam allowance.) Double win! Also, Vancouver has been having a freaky dry-spell - which means that we've been having crazy static electricity. Amazingly, this helped keep the slippery charmeuse in place on the mat while cutting, and I didn't make a single cutting mistake. Triple win!
I'd say "all's well that ends well," but I still have the sewing to do, and I don't want to tempt fate here.
Wish me luck? I might need it!
Tuesday, February 8, 2011
Lost & Found
Guys... I have an embarrassing confession to make.
Last week I pre-washed my fabric for my Pendrell blouse... and then I hid it from my cats (the destructive, shedding fur-monsters)... and now I can't find it. Anywhere.
Seriously, I live in a one bedroom apartment with limited storage. Where did I put it?!
Last week I pre-washed my fabric for my Pendrell blouse... and then I hid it from my cats (the destructive, shedding fur-monsters)... and now I can't find it. Anywhere.
Seriously, I live in a one bedroom apartment with limited storage. Where did I put it?!
Monday, February 7, 2011
Damask
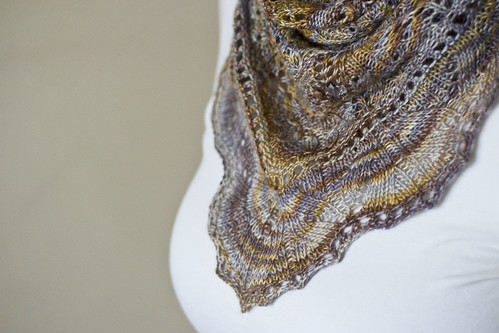
I spend a lot of time on the bus - about 1.5 hours per day commuting, plus errands. There are two consolations to being a bus rider: The first is feeling like you're helping the environment (although, frankly, if I could afford a car I'd have one); the second is the reading/knitting time. In addition, I'm no longer in distance education as of December! That means I'm no longer obligated to devote my 1 hour lunch break to studying - again, more knitting/reading time. Hooray!
Anyway, as a result, I've actually been pretty productive in my non-home hours lately. I've read some really great books, and I have a finished knitting project to share.
The Details:
Pattern: Damask by Kitman Figueroa
Needles: US10 (6mm) and US6 (4mm)
Yarn: Handmaiden Fine Yarns - Mini Maiden (50%merino wool/50% silk)
Gauge: Unknown (didn't matter)
Cast on: January 12, 2011
Bound off: February 3, 2011
Total # of Stitches: 22,036
I can't praise this pattern enough - it was the most fun I've had knitting in a really long time. I especially loved that you cast on the long side (around 300 stitches) and decrease each row, as opposed to shawl patterns that have you do the opposte (increase each row). It allowed for this wonderful snowball effect where each row was a little faster than the last.
As well, the yarn was heaven. Really nothing more to say about it. Just, heaven.

My next project is a pair of socks. Historically I'm not a sock knitter, but I seem to have been bitten by the bug. I'm working on a very cool pattern with some gorgeous local yarn - Tough love Sock by Sweet Georgia Yarns, in the Lakeshore Drive colourway.

Yum.
Anyway, as a result, I've actually been pretty productive in my non-home hours lately. I've read some really great books, and I have a finished knitting project to share.
The Details:
Pattern: Damask by Kitman Figueroa
Needles: US10 (6mm) and US6 (4mm)
Yarn: Handmaiden Fine Yarns - Mini Maiden (50%
Gauge: Unknown (didn't matter)
Cast on: January 12, 2011
Bound off: February 3, 2011
Total # of Stitches: 22,036
I can't praise this pattern enough - it was the most fun I've had knitting in a really long time. I especially loved that you cast on the long side (around 300 stitches) and decrease each row, as opposed to shawl patterns that have you do the opposte (increase each row). It allowed for this wonderful snowball effect where each row was a little faster than the last.
As well, the yarn was heaven. Really nothing more to say about it. Just, heaven.

My next project is a pair of socks. Historically I'm not a sock knitter, but I seem to have been bitten by the bug. I'm working on a very cool pattern with some gorgeous local yarn - Tough love Sock by Sweet Georgia Yarns, in the Lakeshore Drive colourway.

Yum.
Friday, February 4, 2011
Progress Report
*crickets* *crickets*
I know it's been quiet around here. There hasn't been any sewing time, and I didn't want to overload this blog with filler posts.
Tonight I had the whole night at home, so I had some time to work on my Pendrell. I've started from scratch after the other one turned out so big. A while ago I traced out the pattern pieces for a size smaller (8). Tonight I finished tracing the pattern pieces, made a few tweaks and made up a new muslin. The result was the best so far. Here's what I did:
* lowered the full bust point by 1/2"
* 1" FBA (Fit For Real People method)
* took in 1" at the waist/hip (1/4" from both sides of both front princess seams)
* took in 1" from the hips (1/4" from each side of the each side seam)
* shortened hem by 1"
* lowered neckline by 3"
I know it sounds like a lot, but it really did result in a much better fit. Particularly when I threw caution to the wind, abandoned FFRP and just nipped in the princess seams below the bust. What a difference! On that note, I have to say... the jury is still out for me on the FFRP FBA. In addition to the excess ease at the waist, another problem that's arisen is some excess volume above the full bust. I'm not sure if I have a shallow chest, or if the FBA added volume where it wasn't needed, but there's definitely too much width on the front side panels above the full bust point. I'm not sure yet how I'm going to deal with it, but I know that I'd like to investigate some other full bust fit methods in the future. Any suggestions?
I did make one adjustment that proved totally unnecessary: taking in 1" total (1/4" from each side of each side back princess seam) from the low back, tapering 5 inches or so above and below. This was something I tried when I was working with the larger size and I'd though it helped, but I see now with the smaller size that it just looks and feels over-fit. I'll return that to the original pattern fit before making my final blouse.
Hopefully I'll get back to my normal schedule and fine some more sewing time in the coming week. In the meantime, I have some very exciting knitting to show you. (I knit on the bus and on my lunch hour, so it's a lot easier to keep knitting through the busy times!) Stay tuned for that over the weekend!
Subscribe to:
Comments (Atom)
